sounds intresting. Might investigate that one day.
I have reperated this process about 3 times which has got my headlight looking pretty good (not perfect though). It works but u might need to repeat depending on how bad it was initially.
KJ
DIY: Scratched / Delaminating Headlighs Fix
Moderators: IMC, Club Staff
-
khunjeng

- Oldtimer
- Posts: 4455
- jedwabna poszewka promocja
- Joined: Mon Oct 24, 2005 5:00 pm
- Location: Melbourne, Victoria
-
Hobbsie

- Grease Monkey
- Posts: 391
- Joined: Wed Jul 05, 2006 5:00 pm
- Location: Brisbane
- Contact:
-
Bennoz
- National President
- Posts: 23668
- Joined: Fri Jan 21, 2005 6:00 pm
- Location: Sydney
- Contact:
-
Hobbsie
- Grease Monkey
- Posts: 391
- Joined: Wed Jul 05, 2006 5:00 pm
- Location: Brisbane
- Contact:
-
khunjeng
- Oldtimer
- Posts: 4455
- Joined: Mon Oct 24, 2005 5:00 pm
- Location: Melbourne, Victoria
-
I8A4RE
- QLD Coordinator
- Posts: 9594
- Joined: Mon Aug 28, 2006 5:00 pm
- Location: BOOSTIN in front of you
- Contact:
-
I8A4RE
- QLD Coordinator
- Posts: 9594
- Joined: Mon Aug 28, 2006 5:00 pm
- Location: BOOSTIN in front of you
- Contact:
Yeah did mine today, mine were real bad to,o but i just used 1200 took about 30 mins each light and then used a cut and polish compound (that i brought from a marine shop that the local perspex place recommended) and it came up awesome.
Ps i have sh*t loads of this stuff left so if anyone needs some i have no problem sharing (i brought the buffing plate and lambs wool too) but it will cost u a couple of beers lol
Ps i have sh*t loads of this stuff left so if anyone needs some i have no problem sharing (i brought the buffing plate and lambs wool too) but it will cost u a couple of beers lol
CHRISTIANITY: The belief that a cosmic Jewish Zombie who was his own father can make you live forever if you symbolically eat his flesh and telepathically tell him you accept him as your master, so he can remove an evil force from your soul that is present in humanity because a rib-woman was convinced by a talking snake to eat from a magical tree...

-
Star_Lancer

- Grease Monkey
- Posts: 236
- Joined: Mon Aug 29, 2005 5:00 pm
Great guide!!! Thank you SO much!!!
This was really easy guide to follow to...coming from someone who knows next to nothing about fixing cars etc. or technical stuff whatever.
I did a few things different though...
I just used 1200 and the scratch x with a polishing cloth.
Here are my results!
BEFORE :
:

AFTER :D:D:
:D:D:


This was really easy guide to follow to...coming from someone who knows next to nothing about fixing cars etc. or technical stuff whatever.
I did a few things different though...
I just used 1200 and the scratch x with a polishing cloth.
Here are my results!
BEFORE
AFTER
-
kazbah

- National Secretary
- Posts: 2475
- Joined: Sat Apr 26, 2003 5:00 pm
- Location: Stiff Clutch...
- Contact:

-
FTO338

- Oldtimer
- Posts: 6712
- Joined: Sun Feb 09, 2003 6:00 pm
- Location: Port Melbourne: Pimping with RX400h, B200 Turbo.
-
MissxFTO

- Veteran Mechanic
- Posts: 886
- Joined: Sat Oct 28, 2006 5:00 pm
- Location: Brisbane
- Contact:
-
MissxFTO
- Veteran Mechanic
- Posts: 886
- Joined: Sat Oct 28, 2006 5:00 pm
- Location: Brisbane
- Contact:
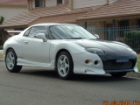
Just thought i would let you know - My light got fixed from a fella who does mobile light fixing.. lol?
If anyone is interested & cant be bothered doing it themselves he makes them look like brand new!!
GT Glass Technology - 0413 444 787
Cost me $88.00 inc GST - wich i dont mind paying because he came to my work and made it better than ever! He does the southside so like mt gravatt - cleveland capalaba carindale, those sorts of area's. Im sure he would do nth side etc - just have to ring & ask.
If anyone is interested & cant be bothered doing it themselves he makes them look like brand new!!
GT Glass Technology - 0413 444 787
Cost me $88.00 inc GST - wich i dont mind paying because he came to my work and made it better than ever!
[img]http://img291.imageshack.us/img291/923/msf70lz5.jpg[/img]
-
Camo
- Grease Monkey
- Posts: 382
- Joined: Sun Apr 17, 2005 5:00 pm
- Location: Melbourne
Just did mine today and came up a treat!
1200 wet and Dry then some Scratch X applied with the foam applicator disc and then buffed off with a lambs wool mitten.
Took about an hour all up, but i stopped lots of times to let them dry and check where needed some more love.
Easy and well worth the time!
Great job to do on the weekend, or even just after work as you have a beer!
-
aza013
- NSW Coordinator
- Posts: 9087
- Joined: Mon Mar 26, 2007 5:00 pm
- Location: The Shire
- Contact:
-
aza013
- NSW Coordinator
- Posts: 9087
- Joined: Mon Mar 26, 2007 5:00 pm
- Location: The Shire
- Contact:
-
Grue

- Veteran Mechanic
- Posts: 876
- Joined: Fri Sep 17, 2004 5:00 pm
- Location: Taranaki, New Zealand.
- Contact:
-
harry90

- Oldtimer
- Posts: 1768
- Joined: Sat Jul 14, 2007 5:00 pm
- Location: sydney
did NOT work for me !!! was sanding away for 3-4 hours(on one light).... made it worse !!! then applied the polish which did absolutely nothing !!! the first few steps with the white substance coming off worked ... but nothing past that... anyone got anymore advice before i go to misubishi and order brand new ones ?