Home-made Gear Gator

Bodykits, Interior modifications, Rice Products, anything that is for looks

Moderators: IMC, Club Staff

Post Reply
Pomwa
Grease Monkey
Posts: 180
jedwabna poszewka promocja
Joined: Mon Feb 19, 2007 6:00 pm
Location: Canberra
Contact:

Home-made Gear Gator

Post by Pomwa »

I’ve been spending some time focusing on my interior of late and have just hand sewn a new gear gator using some of the extra Leatherette I bought, because as some of you may remember I used to have what looked like MC Hammers pants around my stick…… for those of you that don’t here’s a picture :D

Image

Image

Mine is a Tip so the measurements are for that but I’m pretty sure it would be the same for a manual.

Below are the measurements and process involved if anyone else is interested in doing the same:

1. Prep: Measure and mark on the back of the intended material where you’re going to cut and later fold, and then cut out using a sharp pair of scissors. Don’t use a Stanley knife as this can crease the material as you’re cutting and cause a jagged cut.

Image

Image

2. Sewing: I did mine by hand but if you’ve got a bored mum or grandma I’m sure she could whip this together in a fraction of the time it took me….. The main thing to remember is that you are sewing the edges together from the back (or inside out) of the material. Start from the bottom of the panel and work your way along the edge a couple of millimetres in using small stitches. Don’t panic if when you reach the top the panels are off in length because that will be covered with a collar in the final process. Repeat until you have an inside out pyramid of material.

Image

3. Bottom: Fold up the bottom to meet the fold line you marked out at the beginning and chuck in a couple of staples to hold it in place. I found 3 per panel worked well with one in the middle and one on each of the edges. Get a piece of elastic roughly 450mm in length and feed it around the bottom edge, bunching up the material as you go. Once you have the two ends together put in a couple of stiches in the ends so they stay together. Add more staples all around the bottom so that it is secure.

Image

Image

4. Top: Turn the fabric the right way (not inside out) and pick one of the panels and staple the middle of the collar to that panel. Manipulate the collar and repeat the process to the panel on the left and right of your first staple. The collar should come together in the middle of the last panel, on the this panel cut down the middle 30-40mm as this will help you get it over your gearstick without removing your gearknob. This is not required if you intend removing your knob. Sew the bottom edge of the collar around the outside of the boot joining together the collar edges if you havn’t slit the last panel, leaving open if you have. Once complete turn the boot inside out and fold the top part of the collar down and repeat the process of stitching it to the panels.

Image

Image

5. Finishing: Now its just a matter of tidying up the edges of the collar with a couple of stitches and fitting around your gearstick using the original rubber collar will hide the staples at the bottom and ensure it stays in place.

Image

Image
If you can't be good, be good at it!!
User avatar
harry90
Oldtimer
Posts: 1768
Joined: Sat Jul 14, 2007 5:00 pm
Location: sydney

Post by harry90 »

It looks alright i guess....but whats the point when the car is a tiptronic ?
[url=http://imageshack.us][img]http://img413.imageshack.us/img413/1071/avatarxj1.jpg[/img][/url]
Pomwa
Grease Monkey
Posts: 180
Joined: Mon Feb 19, 2007 6:00 pm
Location: Canberra
Contact:

Post by Pomwa »

The same reason for changing the tip knob, pedals, handbrake and putting in Angel Eyes...... for styling!!

Plus it covers the cracks in the tip gear indicator.. ;)
If you can't be good, be good at it!!
User avatar
J
Oldtimer
Posts: 2182
Joined: Fri Apr 18, 2008 5:00 pm
Location: Sydney West
Contact:

Post by J »

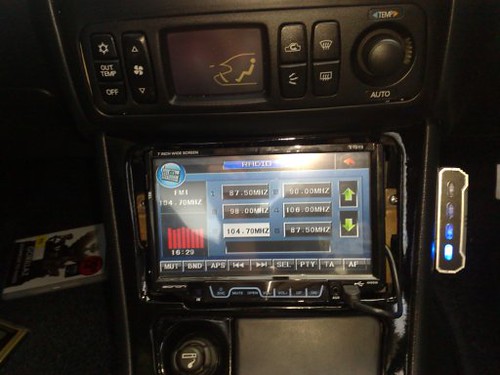
is that an external hard drive on the right of the centre console?
Pomwa
Grease Monkey
Posts: 180
Joined: Mon Feb 19, 2007 6:00 pm
Location: Canberra
Contact:

Post by Pomwa »

No its a switch box for accessories (gps, laptop power) that ive hard wired to the back of the cigarette lighter. And then the power cords to the accessories have been chopped and wired up to the individual switches.
If you can't be good, be good at it!!
User avatar
col2560
Mechanic
Posts: 434
Joined: Fri Jun 06, 2008 5:00 pm
Location: seymour, tennessee, usa
Contact:

Post by col2560 »

so now the tip gearstick looks like a manual?? gr8 idea!!! that's what you call "thinking outside the box" well done !!
my motto; do nothing, then rest.
User avatar
Tippin
Oldtimer
Posts: 1663
Joined: Wed Feb 27, 2008 6:00 pm
Location: Sydney

Post by Tippin »

haha! the first pic is hilarious

good job on making your own one, i made mine too

dont think i have any pics though :?
Pomwa
Grease Monkey
Posts: 180
Joined: Mon Feb 19, 2007 6:00 pm
Location: Canberra
Contact:

Post by Pomwa »

Here's a couple of pics of some other bits im currently re-trimming/working on:

Image

Image

Image

Image

Image
If you can't be good, be good at it!!
User avatar
Shahrez
Mechanic
Posts: 433
Joined: Sat Jun 16, 2007 5:00 pm
Location: Perth, WA
Contact:

Post by Shahrez »

hey mate, how did you patch up your breaks? iam thinking either do fibreglass wrapping. what did u use?
Pomwa
Grease Monkey
Posts: 180
Joined: Mon Feb 19, 2007 6:00 pm
Location: Canberra
Contact:

Post by Pomwa »

First i lined up the broken pieces and held them in place with a piece of tape, with the tape stuck on the front of the surround.

Then a dot of superglue on the back where the break was and smeared it around the break and surrounding area.

Once the glue was dryed some plastic cement was squeezed and smeared ontop of the superglue and surrounding areas

Image

Once that was dry i took the tape off of the front and repeated the process of using the pvc cement on the front of the surround, smoothing it out and ensuring plenty of overlap as i went.

After that dryed i sanded the cement down until it was flush with the surround, cleaned with a dry cloth and sprayed the whole thing with plastic primer.

Image

When that was dry i used a couple of coats of matt black

Image

Couple of coats of Matt was followed by some more plastic primer and then a few coats of gloss. This is what it looks like at the moment. I'm still working on the finish and should have it back in the car tomorrow.

Image

This is the PVC cement i used:

Image

Image

Good luck with your fix 8) [/img]
If you can't be good, be good at it!!
User avatar
Tippin
Oldtimer
Posts: 1663
Joined: Wed Feb 27, 2008 6:00 pm
Location: Sydney

Post by Tippin »

yeh, i repaired my centre console pretty much the same way but also reinforced all the back of it with firbreglass

just cracked again :cry:

im afraid the only way to go is buying a new one, havent heard of anybody successfully repairing it with out cracking again

good luck with yours though :lol:
User avatar
col2560
Mechanic
Posts: 434
Joined: Fri Jun 06, 2008 5:00 pm
Location: seymour, tennessee, usa
Contact:

Post by col2560 »

trouble is the plastic goes brittle after time, so you might be able to repair the cracks but it will crack somewhere else later.
my motto; do nothing, then rest.
Pomwa
Grease Monkey
Posts: 180
Joined: Mon Feb 19, 2007 6:00 pm
Location: Canberra
Contact:

Post by Pomwa »

Its all good ive got a spare one if this one that ive been playing with crumbles into a thousand pieces 8)
If you can't be good, be good at it!!
Pomwa
Grease Monkey
Posts: 180
Joined: Mon Feb 19, 2007 6:00 pm
Location: Canberra
Contact:

Post by Pomwa »

Thought id share some photos of the end result of the stereo surround i was fixing up:

Image

Image

Image

Image
If you can't be good, be good at it!!
User avatar
col2560
Mechanic
Posts: 434
Joined: Fri Jun 06, 2008 5:00 pm
Location: seymour, tennessee, usa
Contact:

Post by col2560 »

oh no !!!!!!!!! you'll have to sell your car, the cigarette lighter is upside down !!!!!
my motto; do nothing, then rest.
Pomwa
Grease Monkey
Posts: 180
Joined: Mon Feb 19, 2007 6:00 pm
Location: Canberra
Contact:

Post by Pomwa »

hahahaha...... better check that my 710 cap doesnt need replacing aswell :roll:
If you can't be good, be good at it!!
User avatar
I8A4RE
QLD Coordinator
Posts: 9594
Joined: Mon Aug 28, 2006 5:00 pm
Location: BOOSTIN in front of you
Contact:

Post by I8A4RE »

Looks great. Did you clear coat it? You should if you havent
Pomwa
Grease Monkey
Posts: 180
Joined: Mon Feb 19, 2007 6:00 pm
Location: Canberra
Contact:

Post by Pomwa »

No clear coat....
1 x clear plastic primer,
2 x matt black,
1 x clear plastic primer,
2 x acrylic black gloss
3 x UV protective gloss

probably a bit of an overkill but did the job and im happy with the results :D
If you can't be good, be good at it!!
User avatar
Shahrez
Mechanic
Posts: 433
Joined: Sat Jun 16, 2007 5:00 pm
Location: Perth, WA
Contact:

Post by Shahrez »

Pomwa wrote:No clear coat....
1 x clear plastic primer,
2 x matt black,
1 x clear plastic primer,
2 x acrylic black gloss
3 x UV protective gloss

probably a bit of an overkill but did the job and im happy with the results :D
cheers for that brotha!! will definately attempt that over the weekend!
Pomwa
Grease Monkey
Posts: 180
Joined: Mon Feb 19, 2007 6:00 pm
Location: Canberra
Contact:

Post by Pomwa »

Good luck, hope it turns out well for you and put some pics up when your done :thumleft:
If you can't be good, be good at it!!
Post Reply