DIY: How to replace your rear rotors
Posted: Sun Aug 25, 2013 3:14 pm
Tools you will need
Tire iron or socket and breaker bar
Jack, jack stands and wheel chocks
10mm spanner
12mm socket or spanner
14mm socket or spanner
Small flat head screwdriver
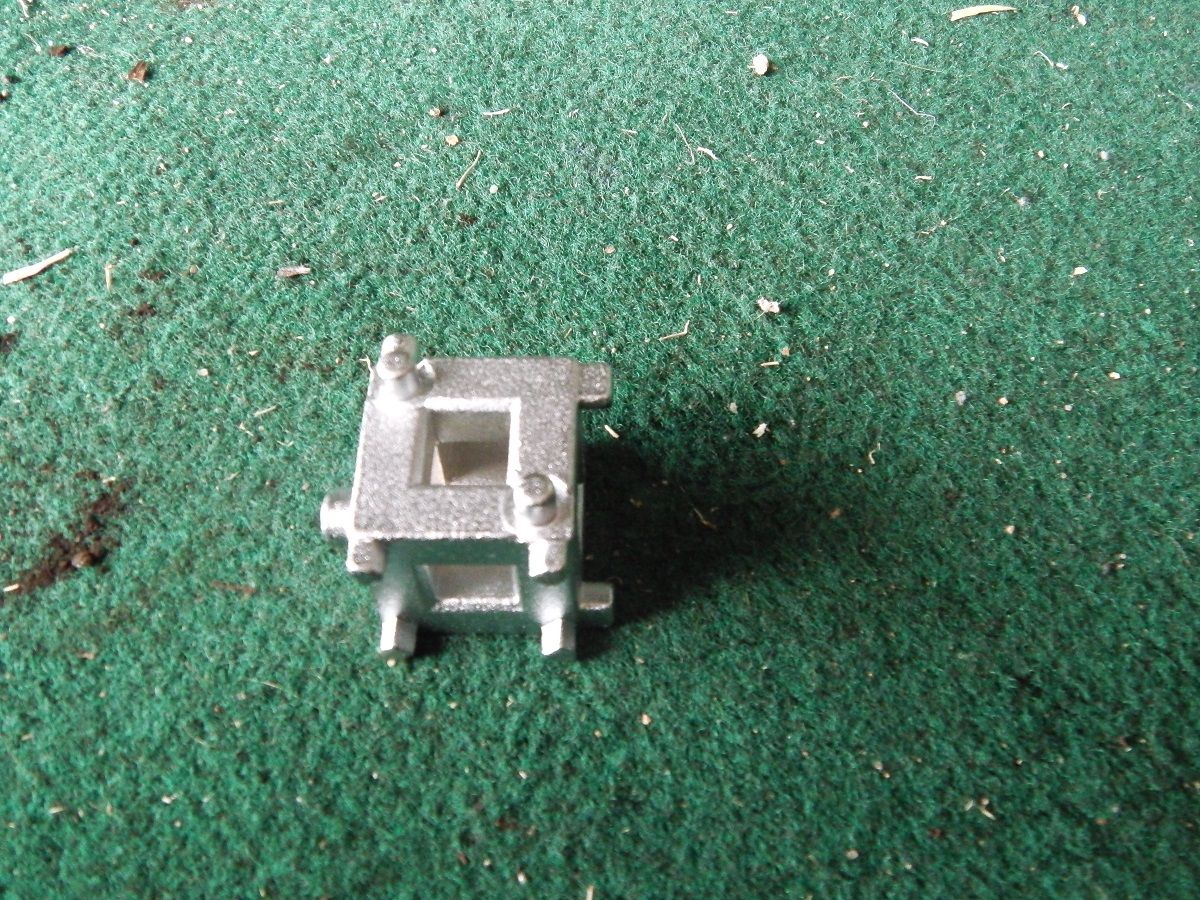
Rear piston compressing tool
Hammer or mallet
Rope or wire
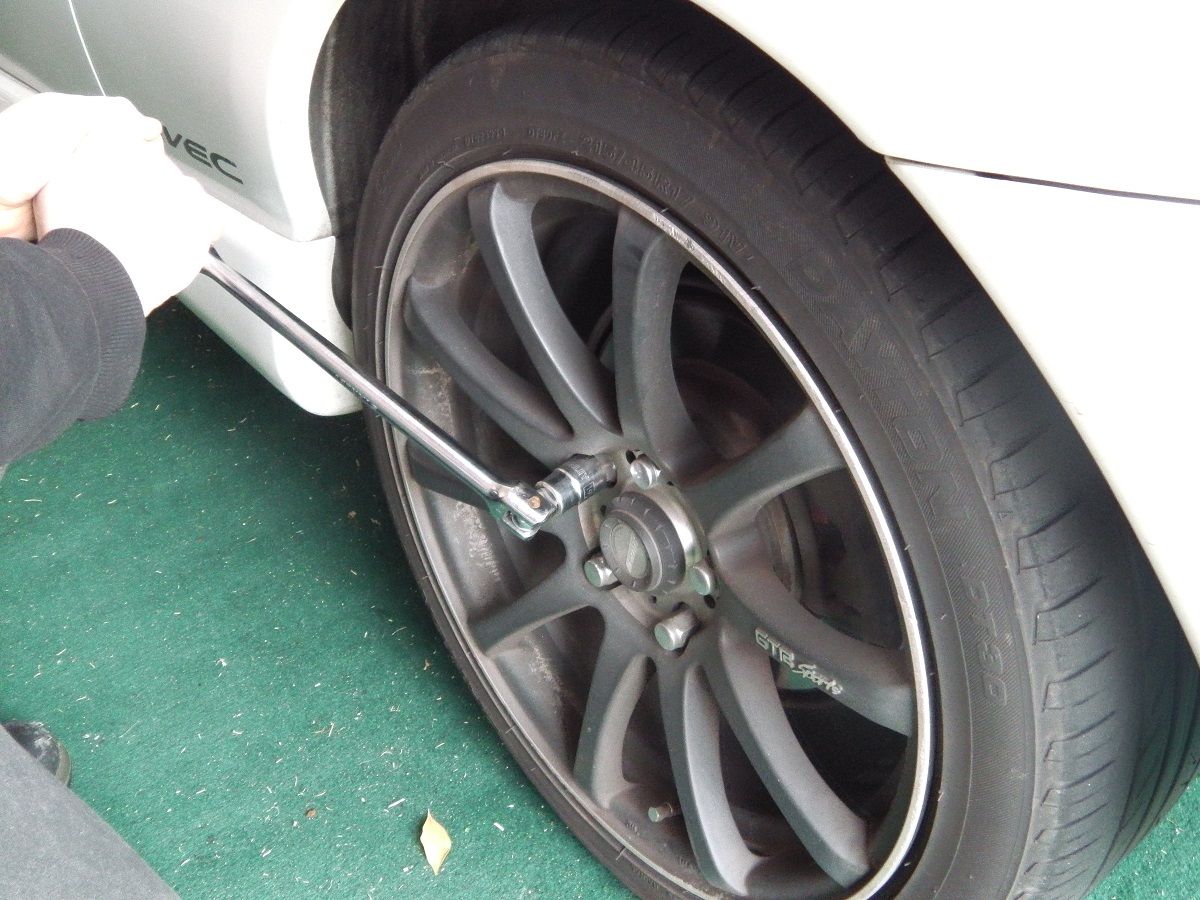
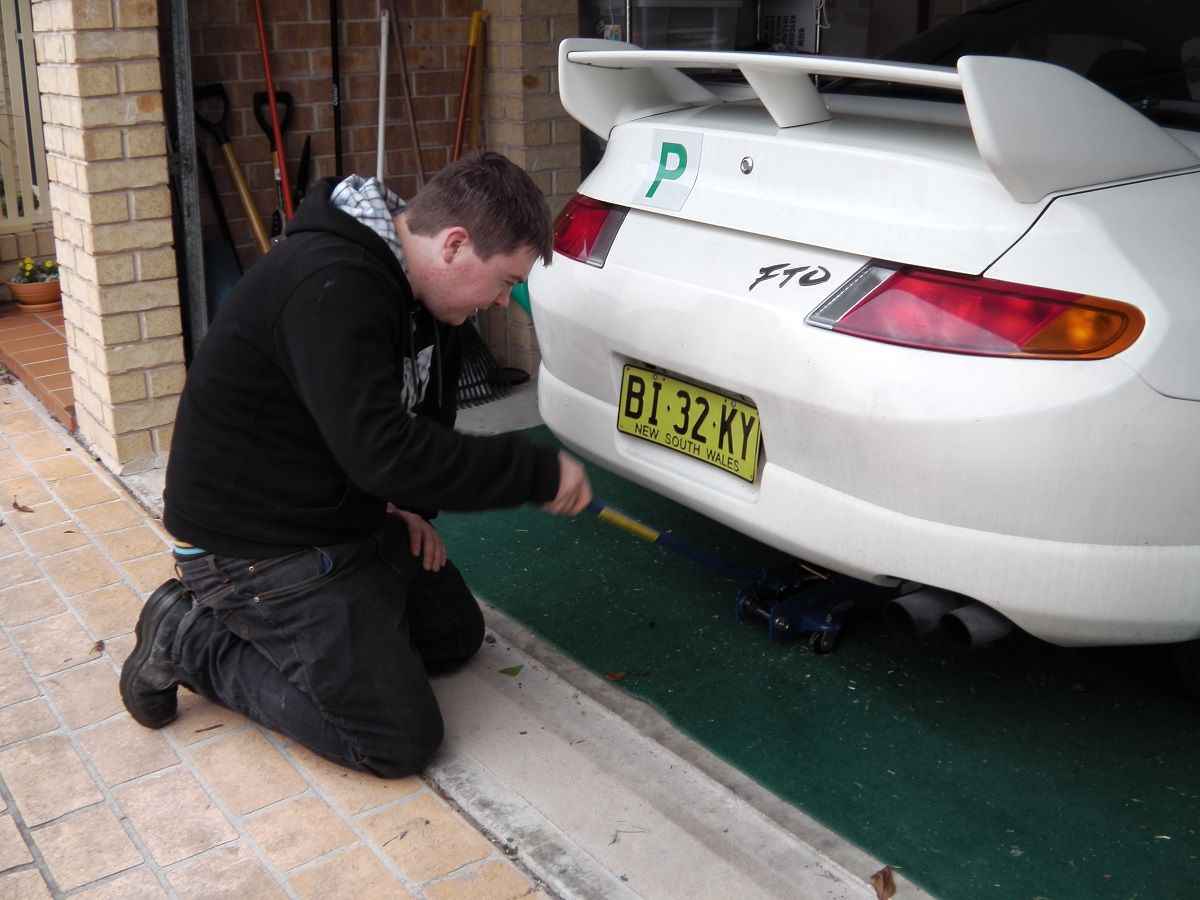
Step 1. Crack the wheel nuts, jack up the car, put it on jack stands, chock the front wheels and remove the wheel.
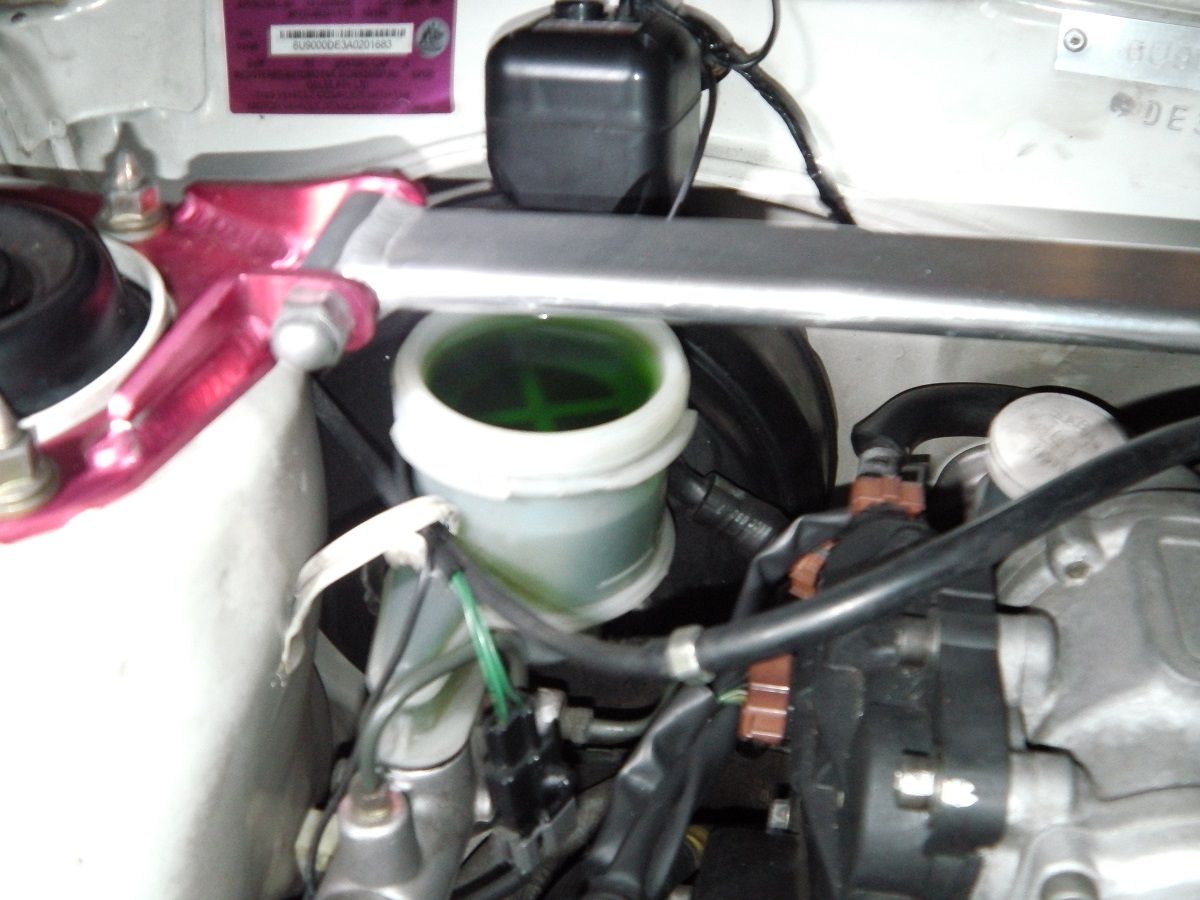
Step 2. Remove the brake fluid reservoir cap located at the back of the engine bay on the drivers side and check the fluid level if it is full as shown in the photo below, remove some of the fluid to allow room for the fluid that will be pushed into the reservoir.
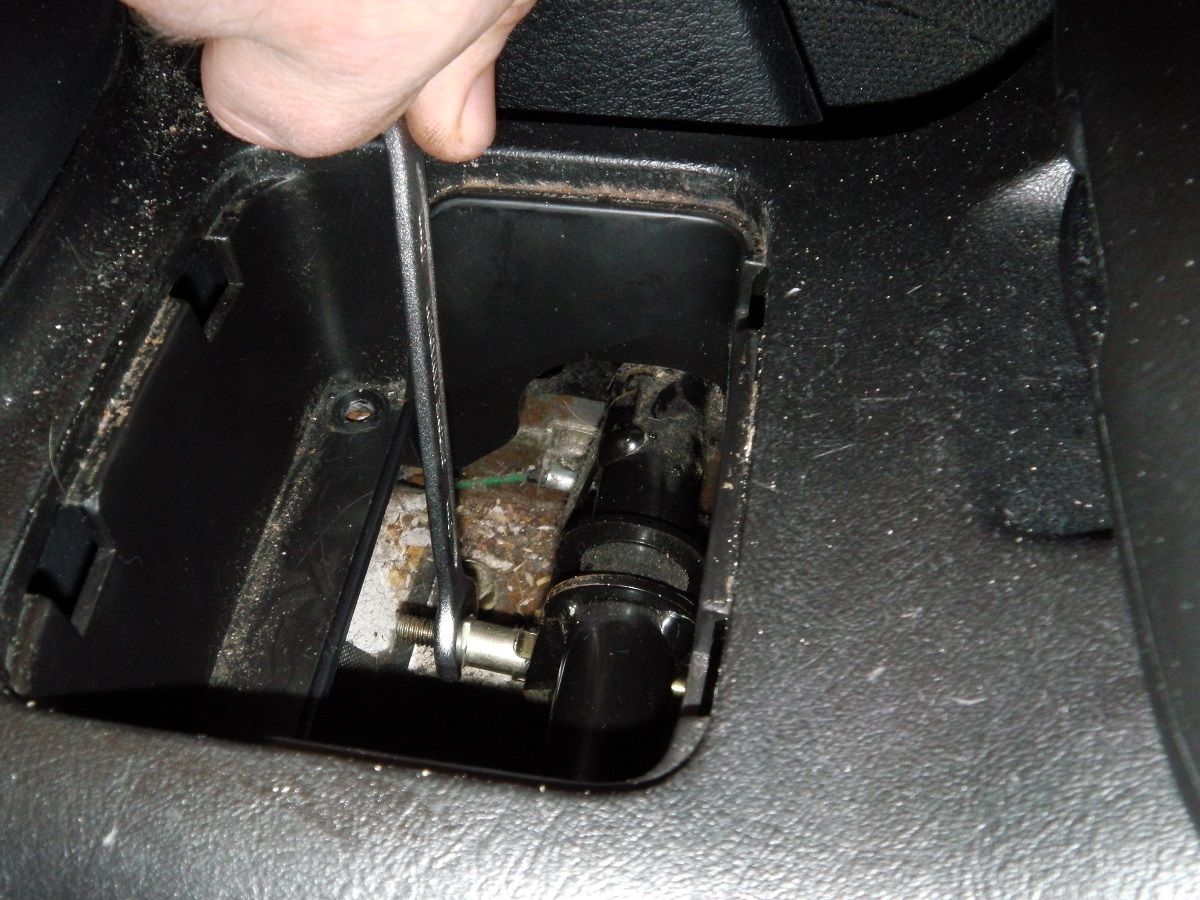
Step 3. Put the handbrake down, remove the cup holder by pulling it up with your hand and release the handbrake tension by loosening the nut with a 10mm spanner.
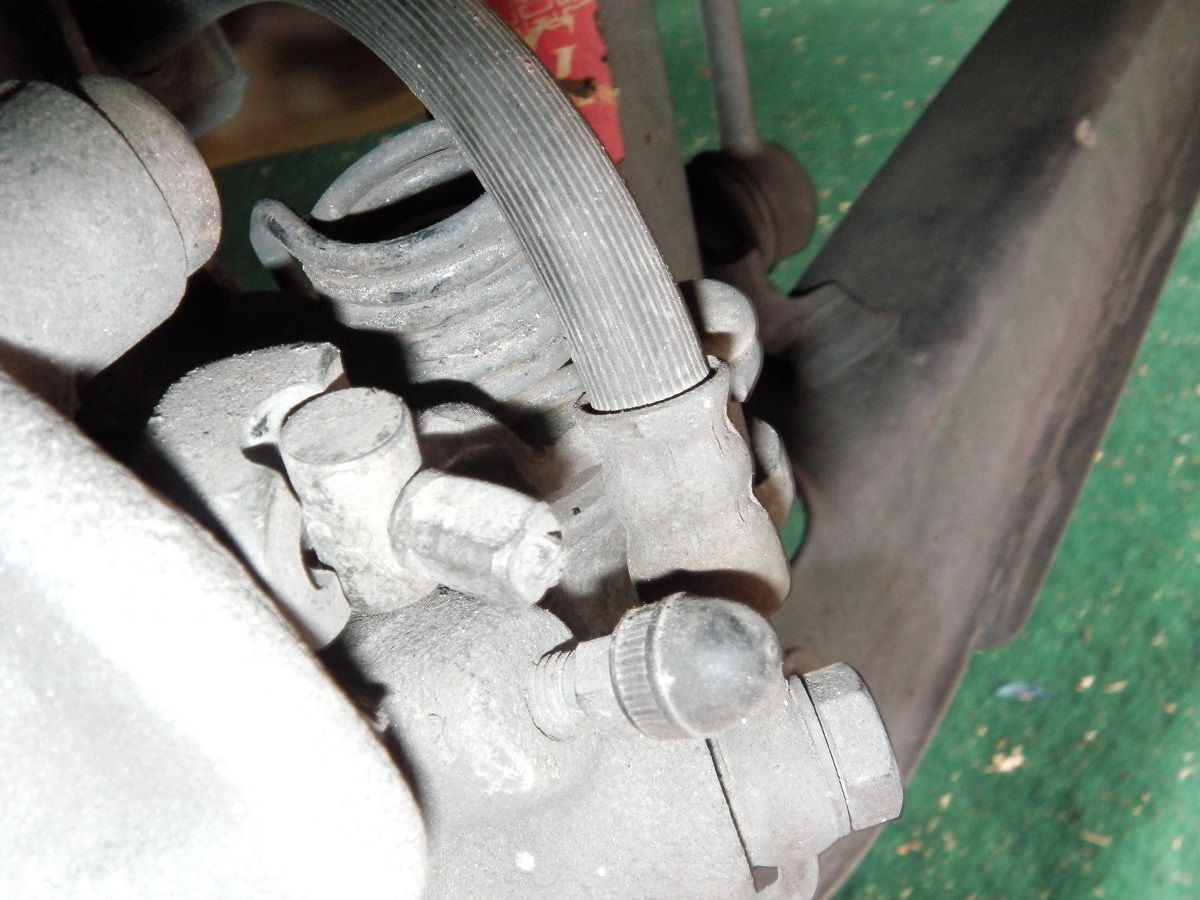
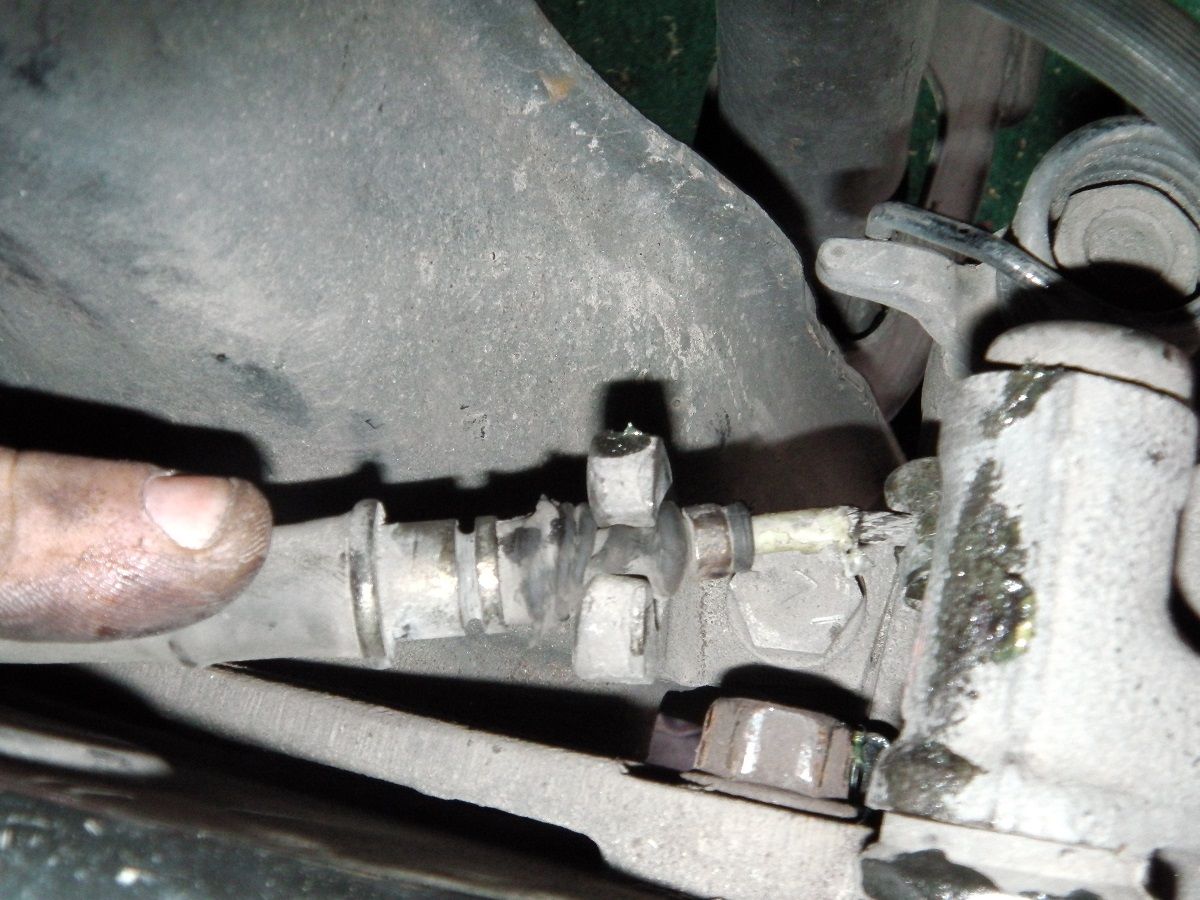
Step 4. Remove the lock pin with a 12mm socket or spanner.

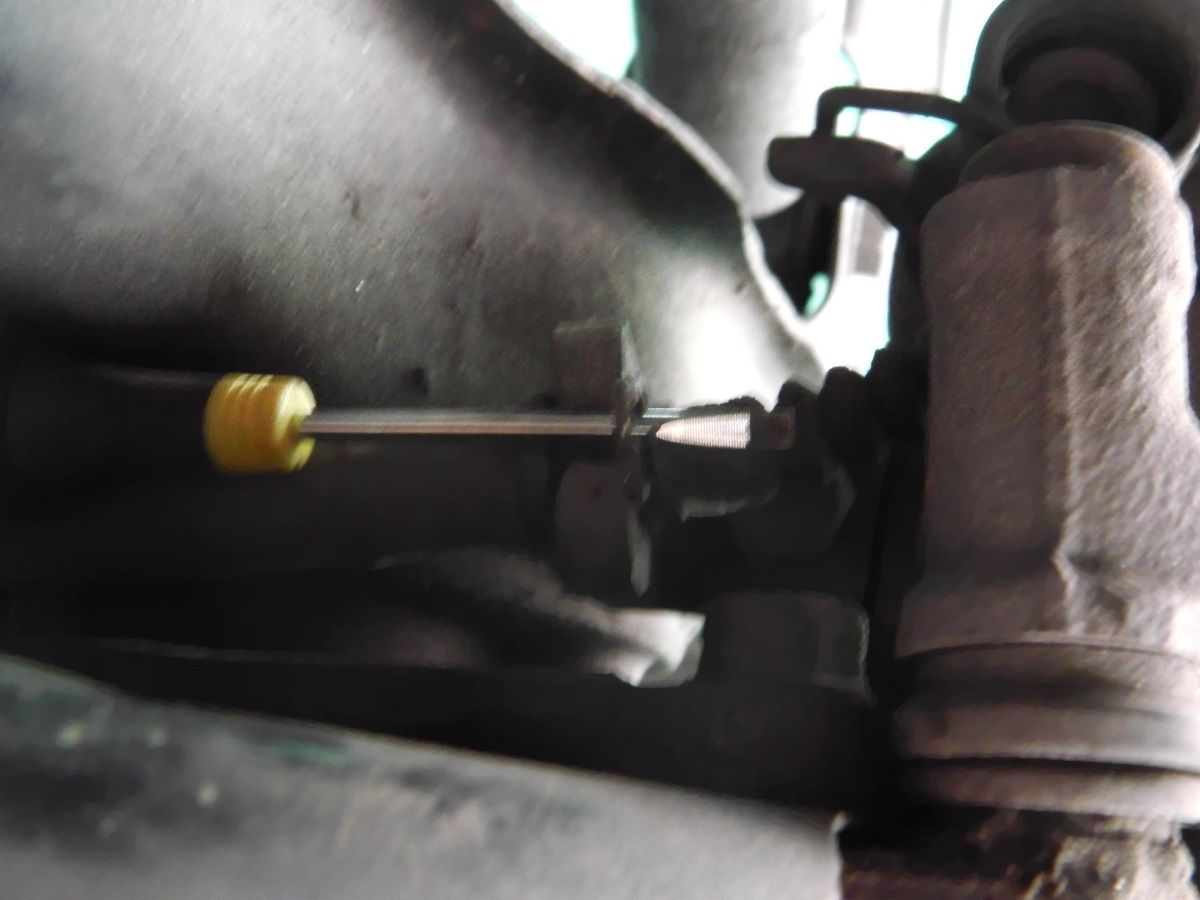
Step 5. Remove the retainer and small pin holding the handbrake cable to the caliper using a small screwdriver and remove the handbrake cable.


Step 6. Swing the caliper up, slide it off the guide pin and tie it to the spring using rope or wire.
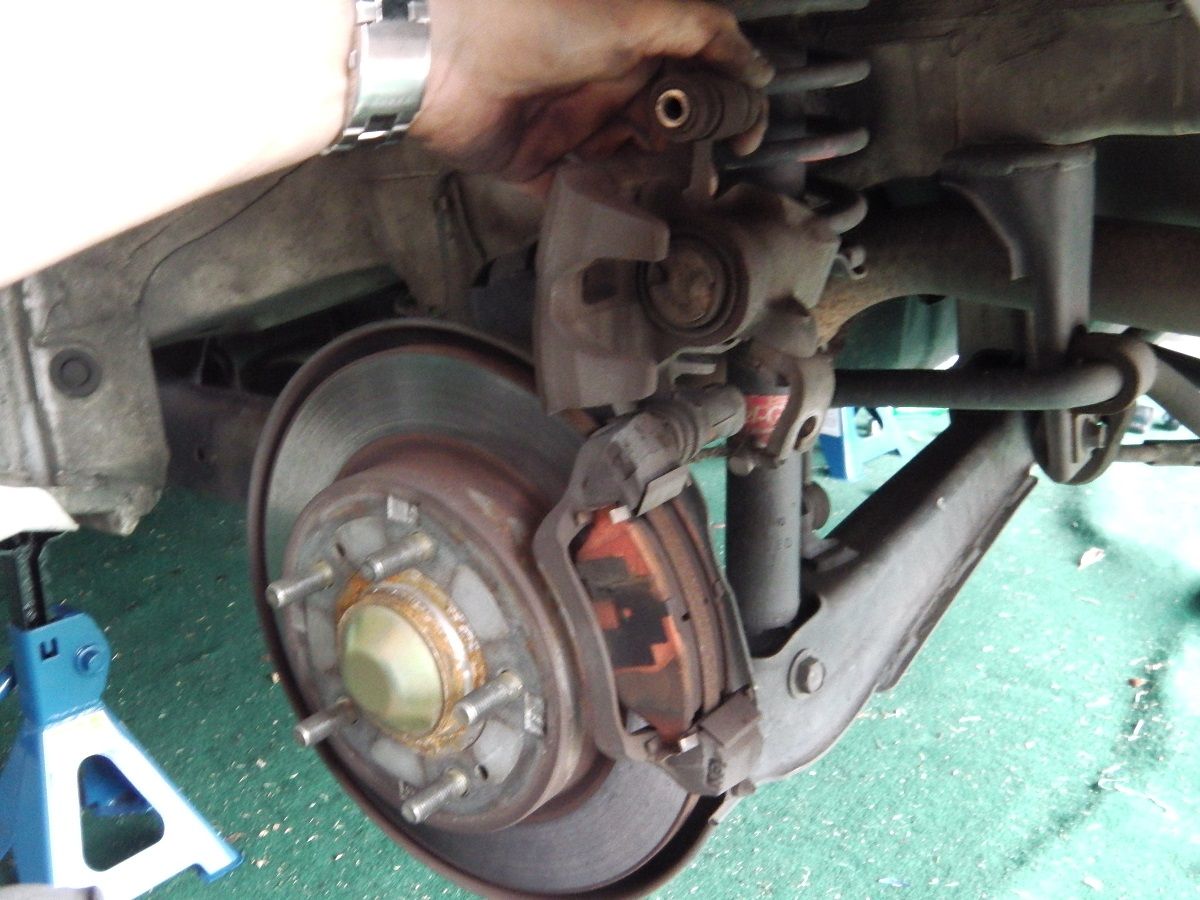

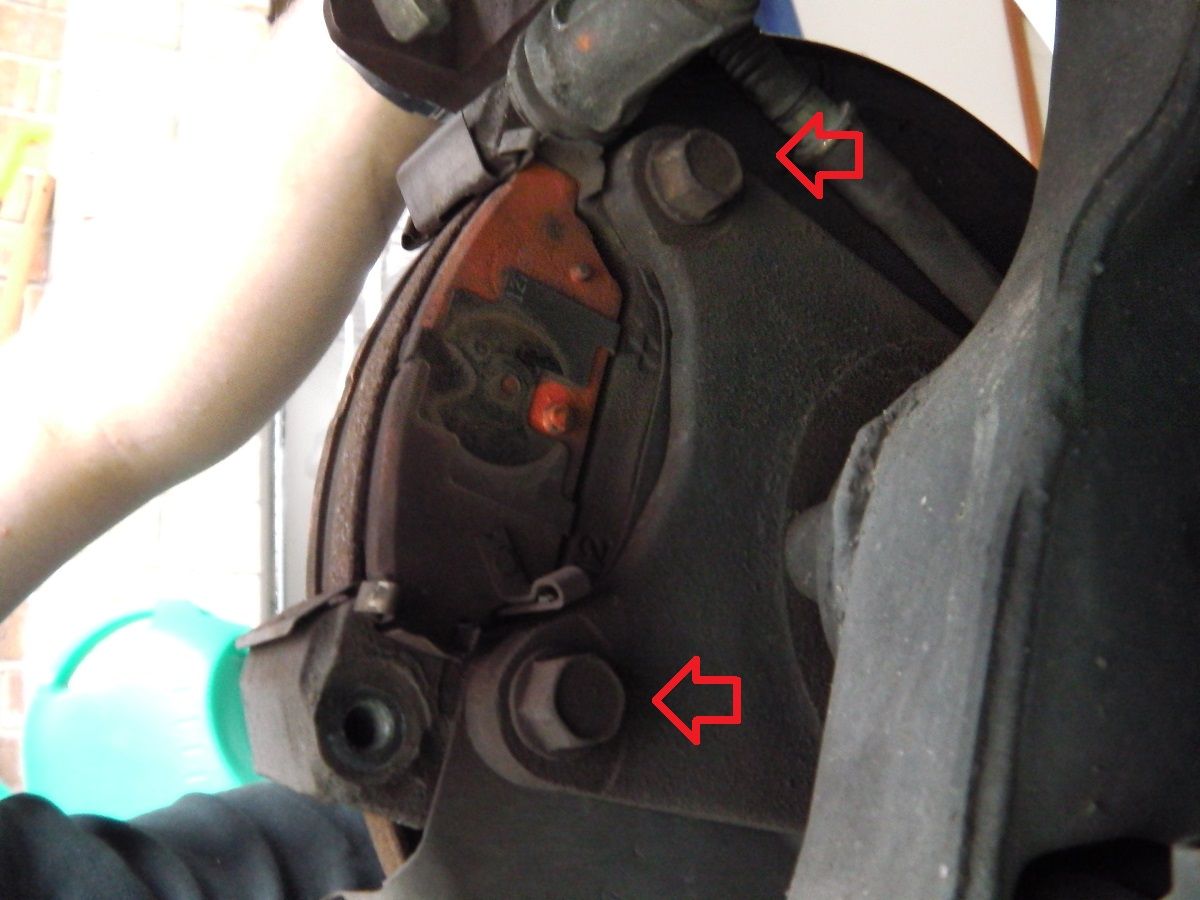
Step 7. Remove the two bolts holding the caliper bracket to the hub using a 14mm socket or spanner.
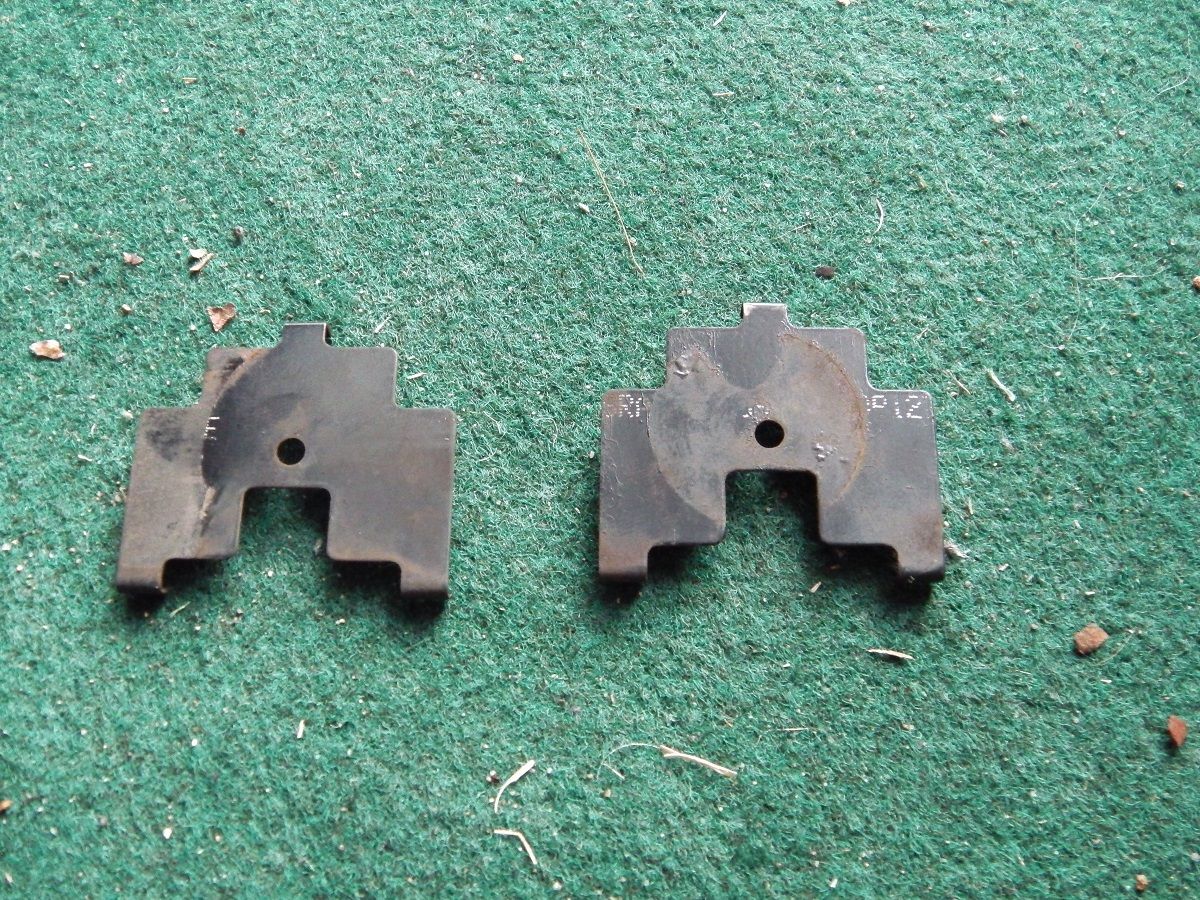
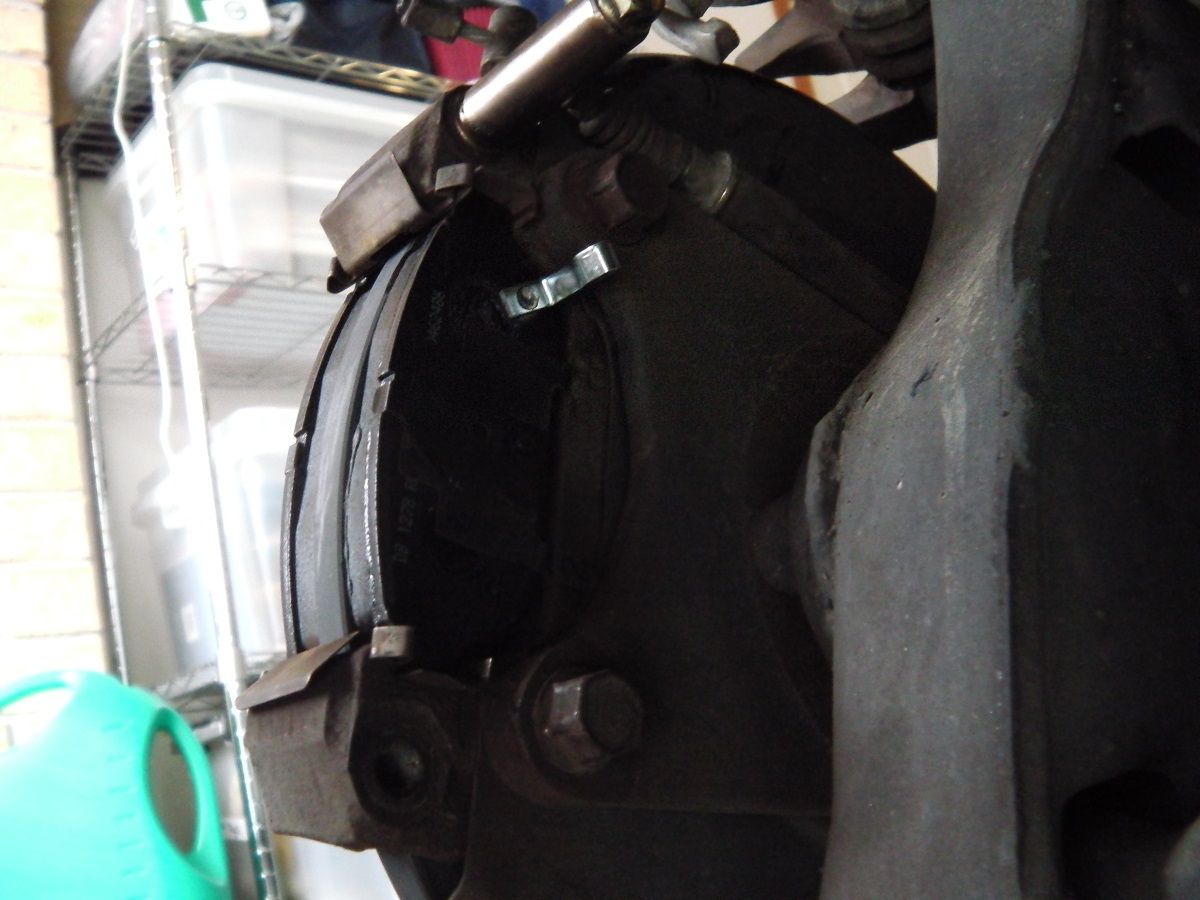
Step 8. Remove the old pads from the bracket. The old pads will have metal shims on the outside of them. If your new pads didn't come with them, swap them over to your new pads. If you don't have these it can cause squealing brakes.
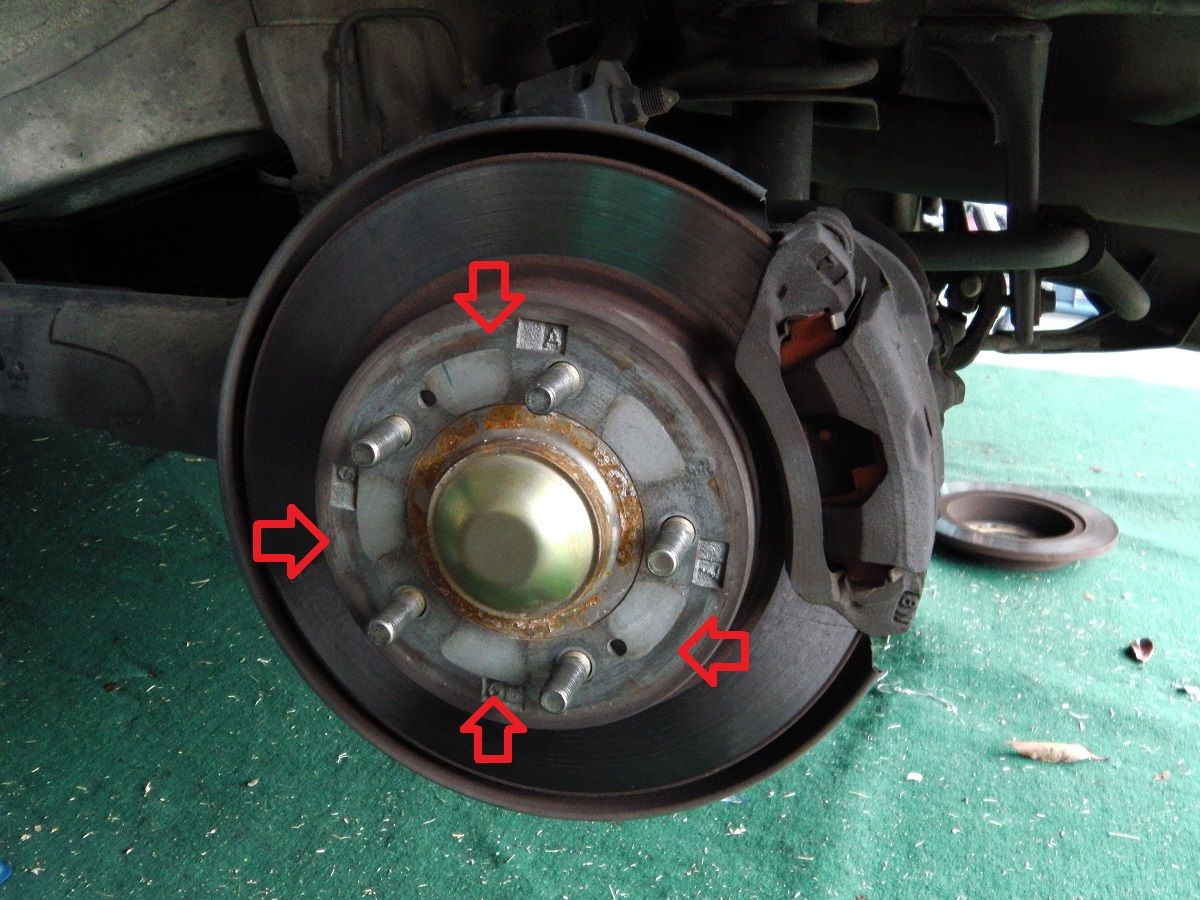
Step 9. Now the rotor is not being held on by anything else but may be stuck to the hub, give it a few taps around the hub area to knock it free, be careful not to hit the studs.
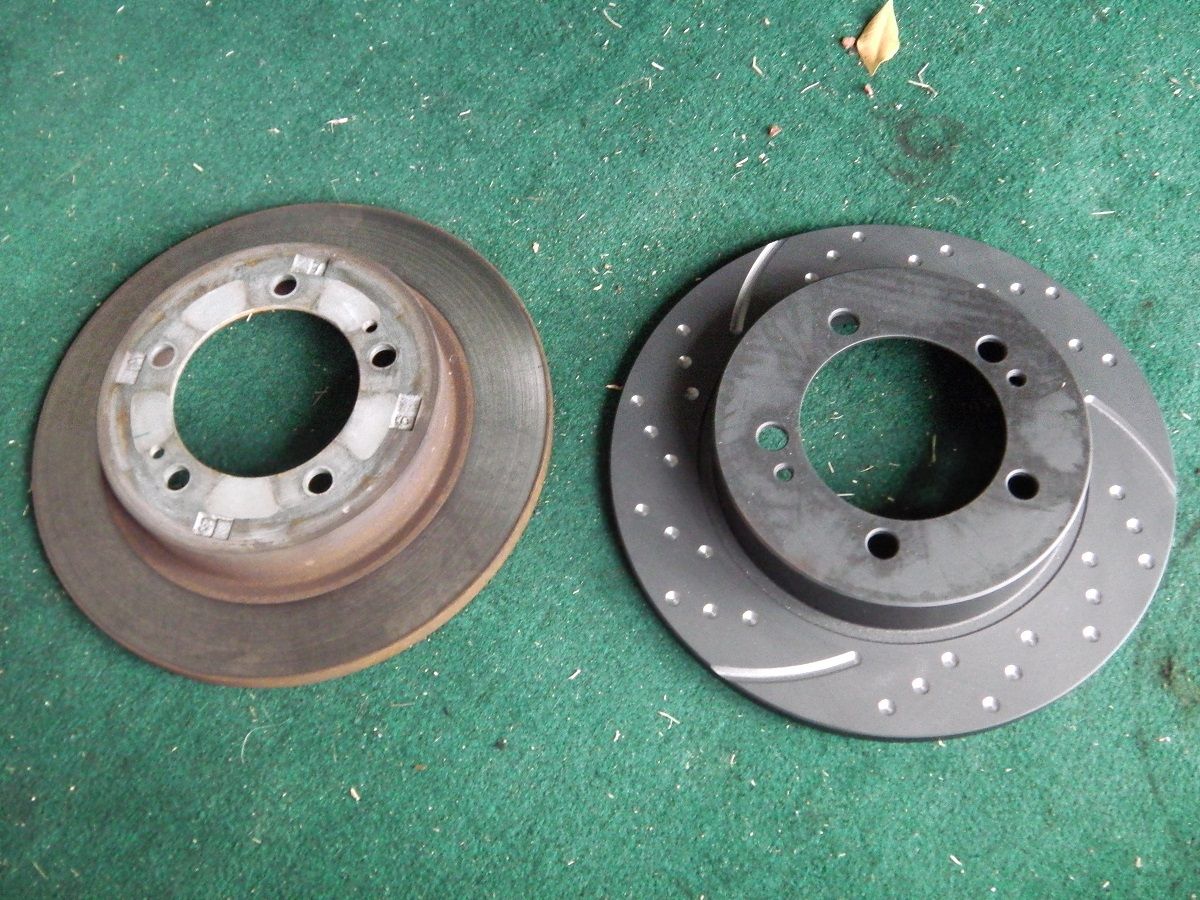
Step 10. Give your new rotor a wipe with a clean rag to get the caster oil off and place it onto the car. If you are using slotted rotors, be sure that the slots are going towards the rear of the car.
Step 11. Bolt the caliper bracket back on to the hub and install the new pads with shim plates, making sure that the pad with the wear indicator goes on the inside.
Step 12. Wipe off the old grease from the guide pin and apply some new high temp grease. Slide the caliper back on to the guide pin.
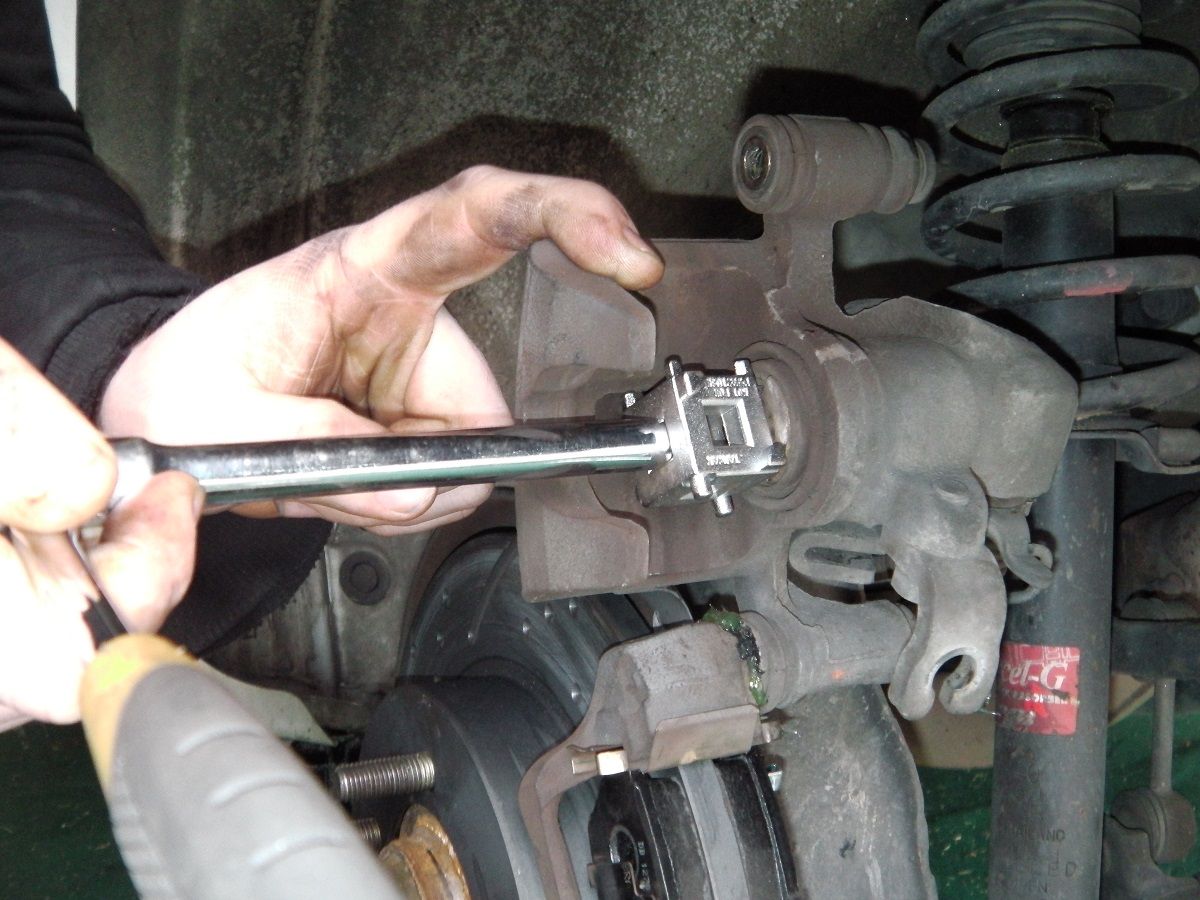
Step 13. The pistons on the rear calipers cannot be just pushed in like the front ones. They need to be screwed in. Using a piston compressing tool, find the side that matches the holes in the piston and screw it in. Make sure that the recess in the piston mates up with the nub on the pad.
Step 14. Swing the caliper back down and tighten up the lock pin
Step 15. Feed the handbrake cable back through the brackets and secure it with the retainer and pin.
Step 16. Put the wheel back on with the wheel nuts finger tight.
Step 17. Check the brake fluid reservoir and the fluid level should have rose a bit from compressing the pistons, get a syringe or spoon and remove the extra fluid, being careful not to get it on your paint as it will eat right through it.
Repeat the above steps on the opposite side.
Step 18. Re tighten the handbrake cable under the cup holder using a 10mm spanner. When you lift your handbrake you should have about 7 or 8 clicks if it has more than this keep tightening, if less loosen it up a bit.
Step 19. Lower the car and tighten the wheel nuts.
Step 20. Before you go for a drive, pump the brake pedal a few times to to push the pistons back into operating position and recheck your fluid level.
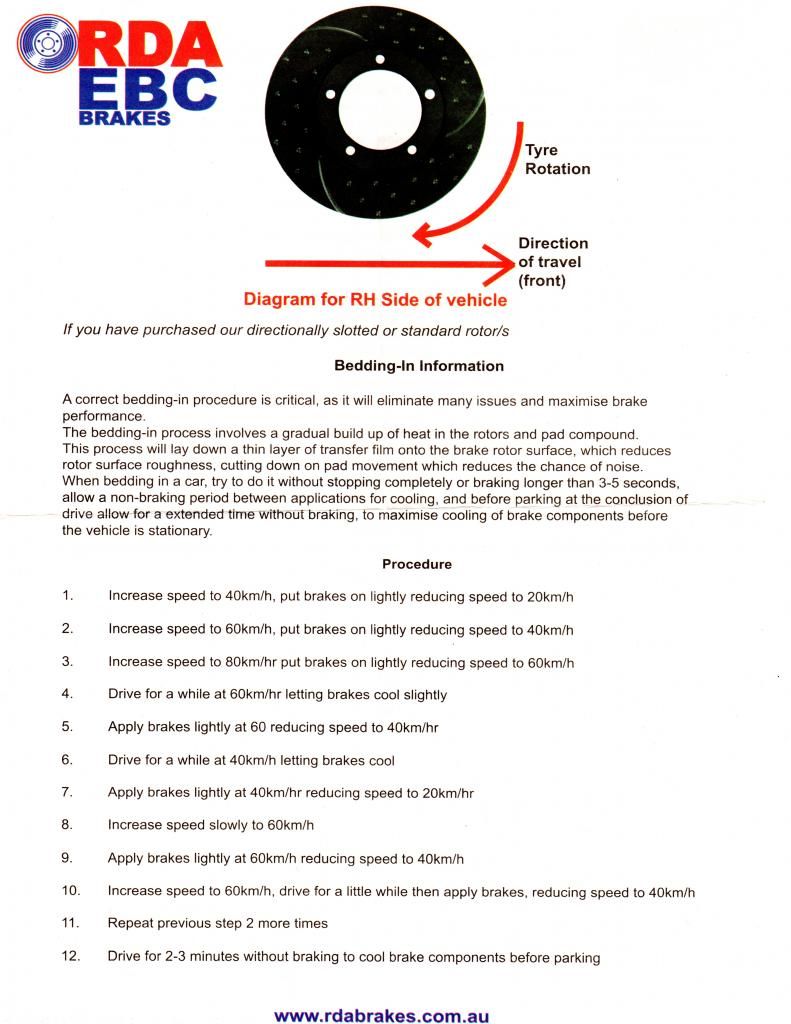
Step 21. When you go for a drive, you will need to bed in the new rotors and pads. This info sheet from RDA explains it nicely. Your brakes may also smoke and smell for a bit but this is nothing to worry about and will stop after the brakes are bedded in.
Tire iron or socket and breaker bar
Jack, jack stands and wheel chocks
10mm spanner
12mm socket or spanner
14mm socket or spanner
Small flat head screwdriver
Rear piston compressing tool
Hammer or mallet
Rope or wire
Step 1. Crack the wheel nuts, jack up the car, put it on jack stands, chock the front wheels and remove the wheel.


Step 2. Remove the brake fluid reservoir cap located at the back of the engine bay on the drivers side and check the fluid level if it is full as shown in the photo below, remove some of the fluid to allow room for the fluid that will be pushed into the reservoir.

Step 3. Put the handbrake down, remove the cup holder by pulling it up with your hand and release the handbrake tension by loosening the nut with a 10mm spanner.

Step 4. Remove the lock pin with a 12mm socket or spanner.

Step 5. Remove the retainer and small pin holding the handbrake cable to the caliper using a small screwdriver and remove the handbrake cable.


Step 6. Swing the caliper up, slide it off the guide pin and tie it to the spring using rope or wire.


Step 7. Remove the two bolts holding the caliper bracket to the hub using a 14mm socket or spanner.

Step 8. Remove the old pads from the bracket. The old pads will have metal shims on the outside of them. If your new pads didn't come with them, swap them over to your new pads. If you don't have these it can cause squealing brakes.

Step 9. Now the rotor is not being held on by anything else but may be stuck to the hub, give it a few taps around the hub area to knock it free, be careful not to hit the studs.

Step 10. Give your new rotor a wipe with a clean rag to get the caster oil off and place it onto the car. If you are using slotted rotors, be sure that the slots are going towards the rear of the car.

Step 11. Bolt the caliper bracket back on to the hub and install the new pads with shim plates, making sure that the pad with the wear indicator goes on the inside.

Step 12. Wipe off the old grease from the guide pin and apply some new high temp grease. Slide the caliper back on to the guide pin.
Step 13. The pistons on the rear calipers cannot be just pushed in like the front ones. They need to be screwed in. Using a piston compressing tool, find the side that matches the holes in the piston and screw it in. Make sure that the recess in the piston mates up with the nub on the pad.


Step 14. Swing the caliper back down and tighten up the lock pin
Step 15. Feed the handbrake cable back through the brackets and secure it with the retainer and pin.
Step 16. Put the wheel back on with the wheel nuts finger tight.
Step 17. Check the brake fluid reservoir and the fluid level should have rose a bit from compressing the pistons, get a syringe or spoon and remove the extra fluid, being careful not to get it on your paint as it will eat right through it.
Repeat the above steps on the opposite side.
Step 18. Re tighten the handbrake cable under the cup holder using a 10mm spanner. When you lift your handbrake you should have about 7 or 8 clicks if it has more than this keep tightening, if less loosen it up a bit.
Step 19. Lower the car and tighten the wheel nuts.
Step 20. Before you go for a drive, pump the brake pedal a few times to to push the pistons back into operating position and recheck your fluid level.
Step 21. When you go for a drive, you will need to bed in the new rotors and pads. This info sheet from RDA explains it nicely. Your brakes may also smoke and smell for a bit but this is nothing to worry about and will stop after the brakes are bedded in.
