Dont tell me I have to pull the whole head off
How the actual fk do I replace the double half moon seals?
Moderators: IMC, Club Staff
-
Funugs

- Grease Monkey
- Posts: 115
- jedwabna poszewka promocja
- Joined: Mon Feb 02, 2015 9:14 pm
How the actual fk do I replace the double half moon seals?
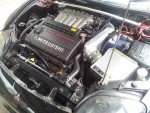
Theres a tiny bit leaking from the cam seals which I have removed and will replace, but I cant figure out how the hell im supposed to replace the double half moons, as they are the main leak.
Dont tell me I have to pull the whole head off
Dont tell me I have to pull the whole head off
-
Vectose

- Forum Moderator
- Posts: 3947
- Joined: Sun Nov 28, 2010 8:45 pm
- Location: Newcastle
Re: How the actual fk do I replace the double half moon seal
Cam carrier needs to come off. Gotta remove all the 12mm bolts on the cam caps if you haven't already done so then give the cam carrier a couple taps upwards with a rubber mallet around the sides to remove it.
It is sealed with high temp silicone RTV
Be careful when removing it though as if there are any loose collets on the tappets they may fall off into your engine.
When putting it back on you will need to run a bead of silicone (Permatex Ultra Grey or similar) around it and then torque all the 12mm bolts back to spec (24nm)
Take a look at the workshop and engine manuals available at www.ftoaustralia.com/downloads
They tell you everything you need to know including torque specs.
Bennoz wrote:A whoooole lot 'o jismTechnikhaus wrote:What is in said Bens big penis by the way?
-
Funugs
- Grease Monkey
- Posts: 115
- Joined: Mon Feb 02, 2015 9:14 pm
Re: How the actual fk do I replace the double half moon seal
Ohh i see, ye I had all the bolts off and the cams out but i didnt know that whole top piece came off, ive tried giving it a smack with a mallet but it doesnt want to move, any other methods to get it off apart from jamming a flathead in the gap and hammering it in, dont want to damage the metal thoughVectose wrote:Cam carrier needs to come off. Gotta remove all the 12mm bolts on the cam caps if you haven't already done so then give the cam carrier a couple taps upwards with a rubber mallet around the sides to remove it.
It is sealed with high temp silicone RTV
Be careful when removing it though as if there are any loose collets on the tappets they may fall off into your engine.
When putting it back on you will need to run a bead of silicone (Permatex Ultra Grey or similar) around it and then torque all the 12mm bolts back to spec (24nm)
Take a look at the workshop and engine manuals available at http://www.ftoaustralia.com/downloads
They tell you everything you need to know including torque specs.
-
Vectose
- Forum Moderator
- Posts: 3947
- Joined: Sun Nov 28, 2010 8:45 pm
- Location: Newcastle
Re: How the actual fk do I replace the double half moon seal
Give it a harder smack with the mallet. :lol:
Just make sure you're using either a rubber or wooden mallet as to not damage the cam carrier.
Just make sure you're using either a rubber or wooden mallet as to not damage the cam carrier.
Bennoz wrote:A whoooole lot 'o jismTechnikhaus wrote:What is in said Bens big penis by the way?
-
Funugs
- Grease Monkey
- Posts: 115
- Joined: Mon Feb 02, 2015 9:14 pm
Re: How the actual fk do I replace the double half moon seal
hmm alright, ill keep at it till it comes off.Vectose wrote:Give it a harder smack with the mallet. :lol:
Just make sure you're using either a rubber or wooden mallet as to not damage the cam carrier.
-
Vectose
- Forum Moderator
- Posts: 3947
- Joined: Sun Nov 28, 2010 8:45 pm
- Location: Newcastle
Re: How the actual fk do I replace the double half moon seal
Make sure once you crack one side you move to the other side as it has locating dowels.
Once cracked you should be able to wiggle it off.
Once cracked you should be able to wiggle it off.
Bennoz wrote:A whoooole lot 'o jismTechnikhaus wrote:What is in said Bens big penis by the way?
-
Funugs
- Grease Monkey
- Posts: 115
- Joined: Mon Feb 02, 2015 9:14 pm
Re: How the actual fk do I replace the double half moon seal
oh man, finally got it off, was whacking away at it for like 20minutes ended up sticking a flathead in there to get it started, got one end of pretty easy then the other side i spent forever trying to get it apart till i realized there where 2 bolts on the side that where holding it on to some small plate of metal. 
Anyways thanks for the help
Anyways thanks for the help
-
Daniel2019
- Oldtimer
- Posts: 7957
- Joined: Thu Jan 12, 2012 12:25 pm
- Location: Sydney!
- Contact:
Re: How the actual fk do I replace the double half moon seal
Funugs wrote:oh man, finally got it off, was whacking away at it for like 20minutes ended up sticking a flathead in there to get it started
I fix cars.
Bennoz wrote:I got Bali beli & sharted on my phone. But it was fun
bjk wrote:you old people are no help at all.
-
silverGPX
- 9.5"
- Posts: 6793
- Joined: Tue Oct 13, 2009 5:00 pm
Re: How the actual fk do I replace the double half moon seal
Lmao fixes half moons has fresh leak from cam carrier
-
Funugs
- Grease Monkey
- Posts: 115
- Joined: Mon Feb 02, 2015 9:14 pm
Re: How the actual fk do I replace the double half moon seal
Ye ikr, I really didnt want to but it was such an awkward angle to try and hit with a hammer and I srsly couldn't see it coming off any other way. Ill make sure I'm extra generous with the liquid gasket in the areas I did it.silverGPX wrote:Lmao fixes half moons has fresh leak from cam carrier
-
Bennoz
- National President
- Posts: 23668
- Joined: Fri Jan 21, 2005 6:00 pm
- Location: Sydney
- Contact:
Re: How the actual fk do I replace the double half moon seal
Be extra generous with thinners before using your gasket goo.Funugs wrote:Ye ikr, I really didnt want to but it was such an awkward angle to try and hit with a hammer and I srsly couldn't see it coming off any other way. Ill make sure I'm extra generous with the liquid gasket in the areas I did it.silverGPX wrote:Lmao fixes half moons has fresh leak from cam carrier