Page 1 of 2
Project FTO VR4
Posted: Sun Apr 17, 2016 8:36 pm
by dazjb
Thought I would start a thread with my FTO VR4 which I have been working on for the last 18 months so you can see where im at. Heres a brief rundown ...
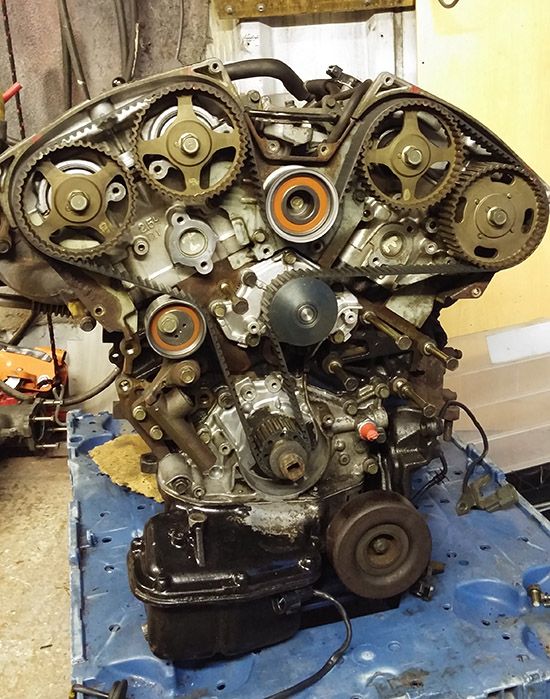
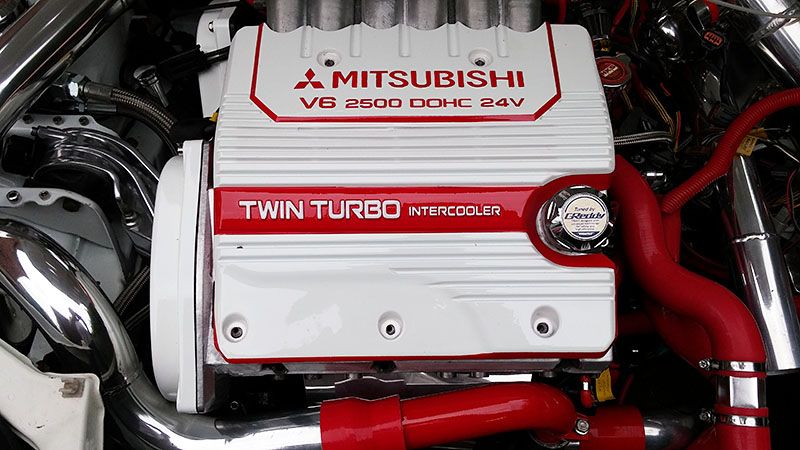
First thing acquire a 6A13TT engine ...
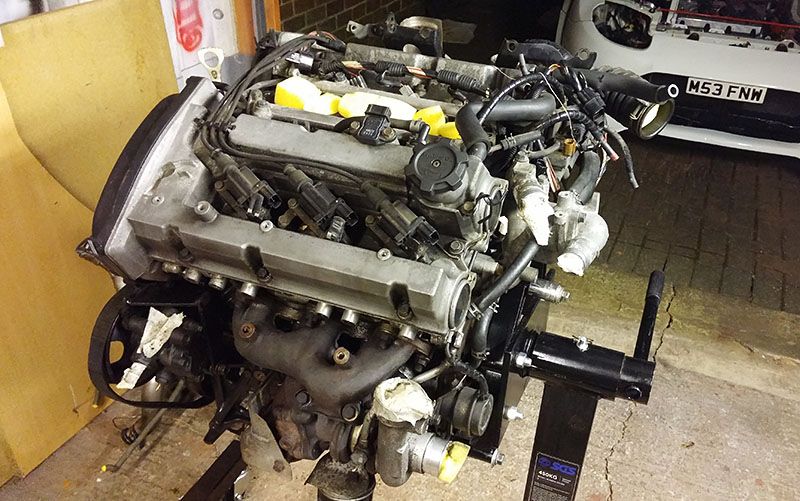
New cambelt, pulleys and waterpump ...
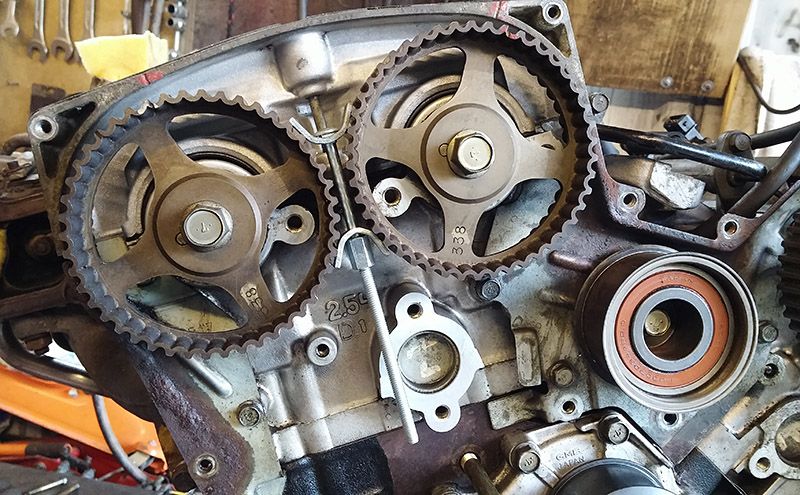
A £1.50 worktop clamp does the trick perfectly as a cam-locking tool ...
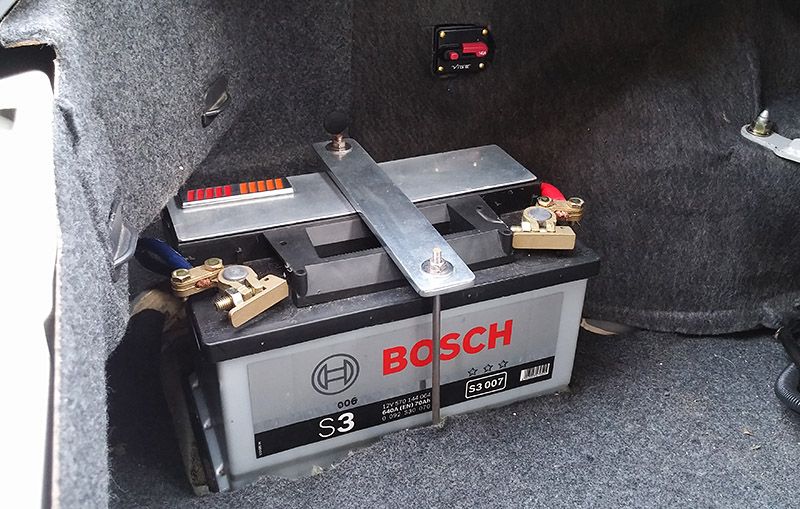
Move this little puppy to the boot ...
Take this big puppy out of the engine bay ...
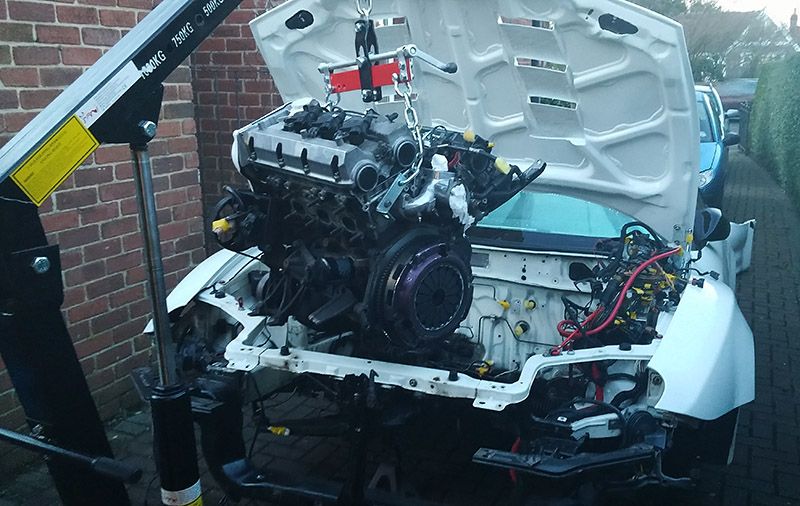
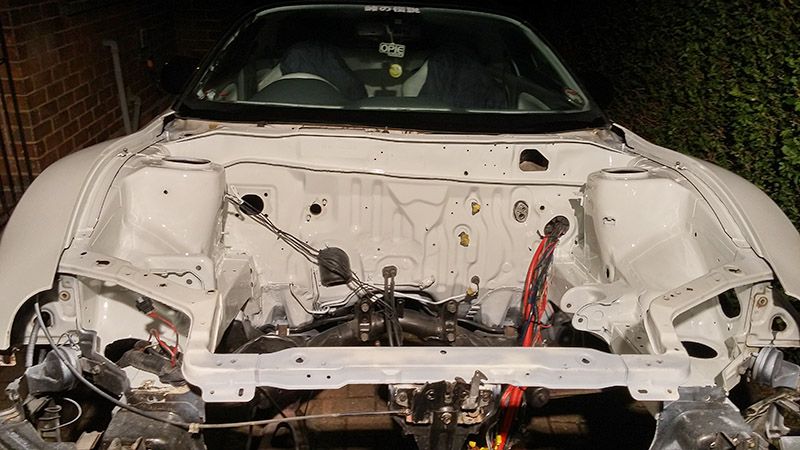
Makes sense to respray the engine bay whilst its bare ...
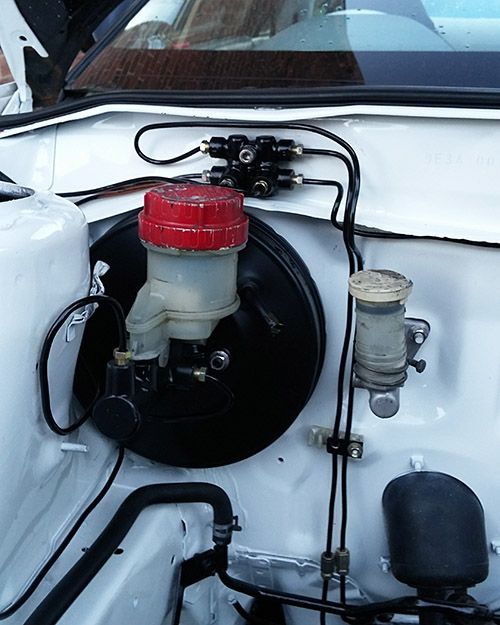
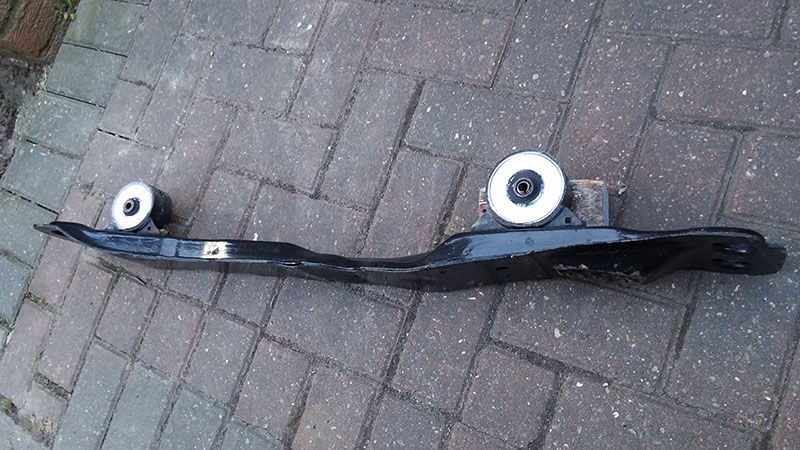
Relocate the brake distribution block ...
And let the new block see its home for the first time ...
Bulkhead pushed back a touch to acommodate the rear turbo ...
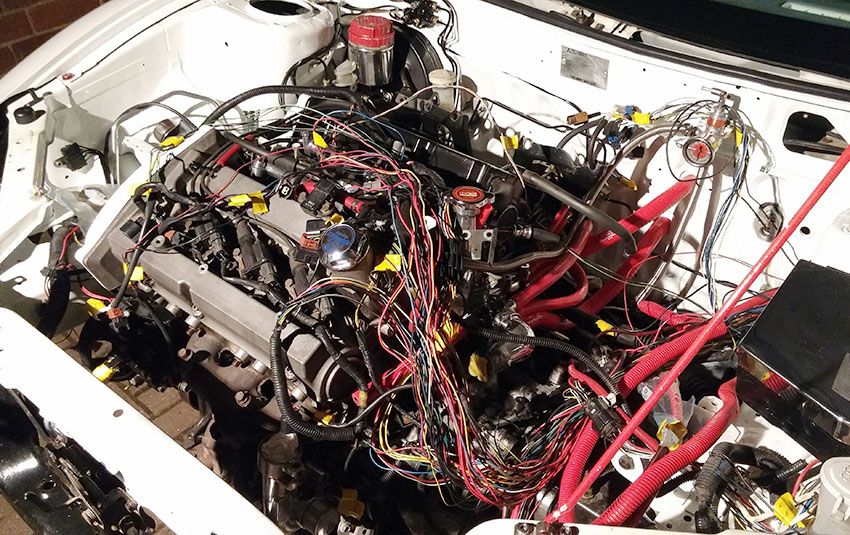
The wiring nightmare begins. I kept the GPX loom in there and just added a few bits from the VR4 loom ...
I'm going to try this ghetto method first of stiffening the engine mounts to limit movement. Using Polyurethane Sealant (Tiger Seal was my choice) to 'thoroughly' fill in the voids on the front and rear gearbox mounts. If I need them to be even stiffer I will get nylon jobbies made up instead but this should do the trick ...
Re: Project FTO VR4
Posted: Sun Apr 17, 2016 8:44 pm
by dazjb
Re: Project FTO VR4
Posted: Sun Apr 17, 2016 8:57 pm
by dazjb
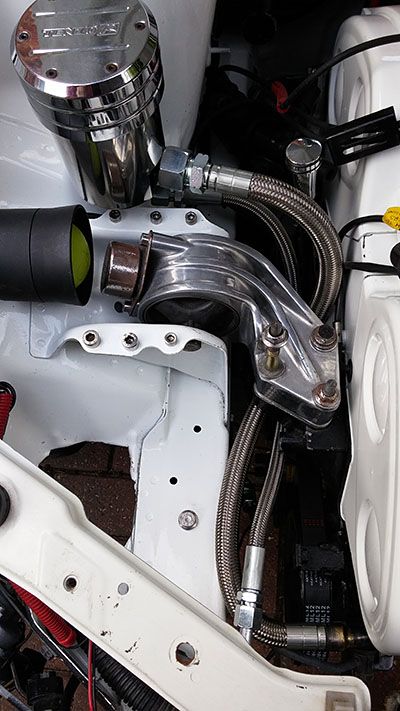
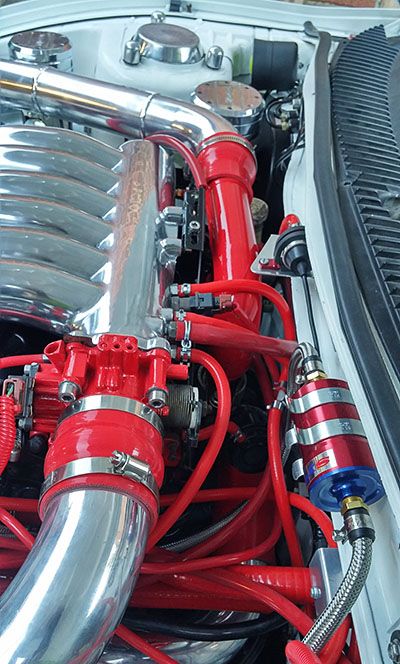
I cut the front turbo pipe and ground it down so it sits at a sharper angle then had it welded up. This helped with lining up to the ally piping ...
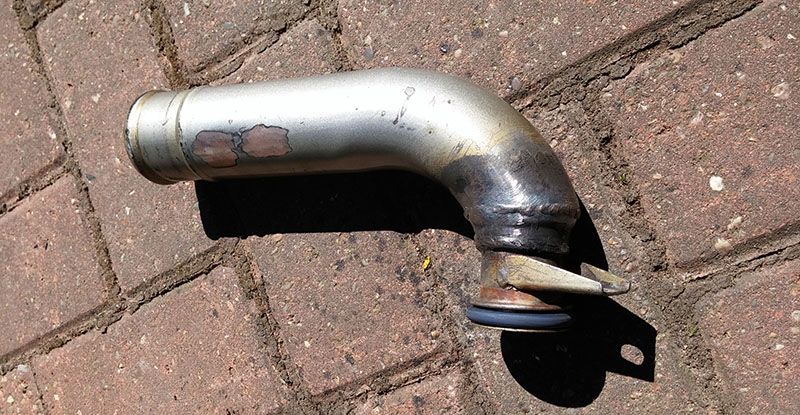
Boost piping welded up and fits a treat ...

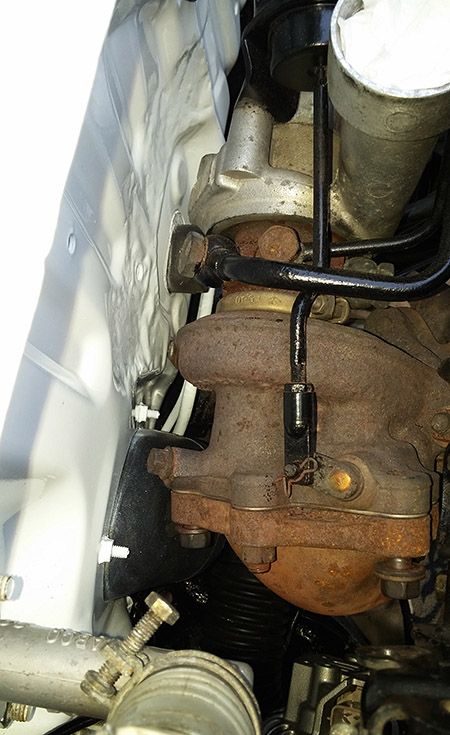
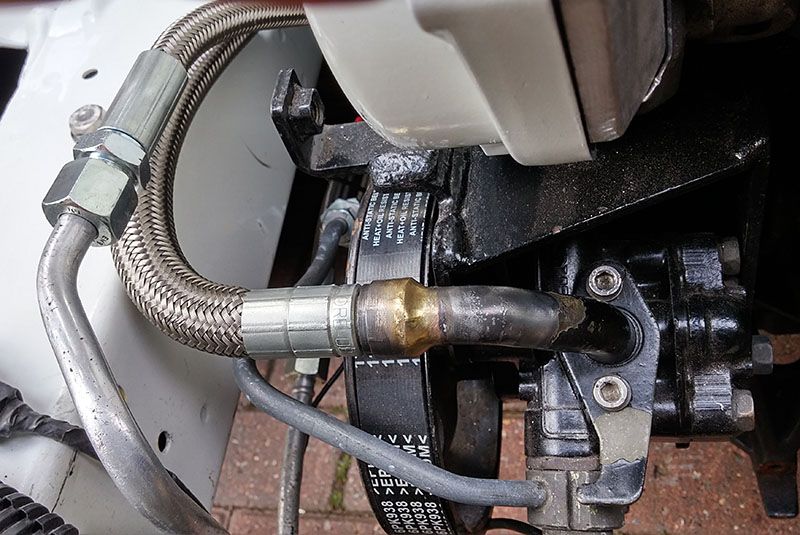
The VR4 turbo elbow has been cut, ground down and welded so its sits at a different angle to clear the power steering rack ...
Last two power steering hoses made up and the reservoir moved ...
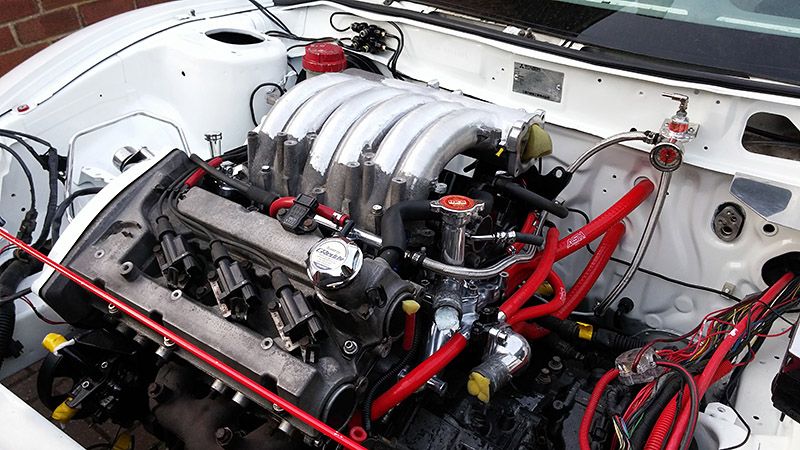
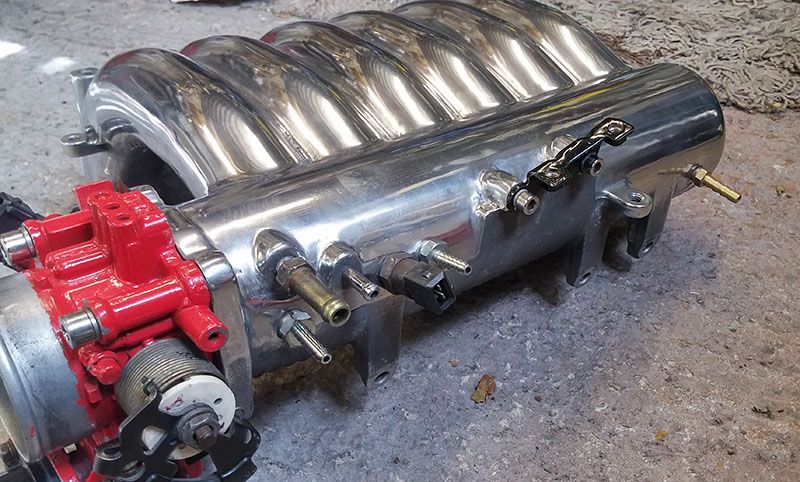
VR4 Engine cover butchered to fit under the FTO bonnet ...
Boost & Vac connections on the back of the plenum ...
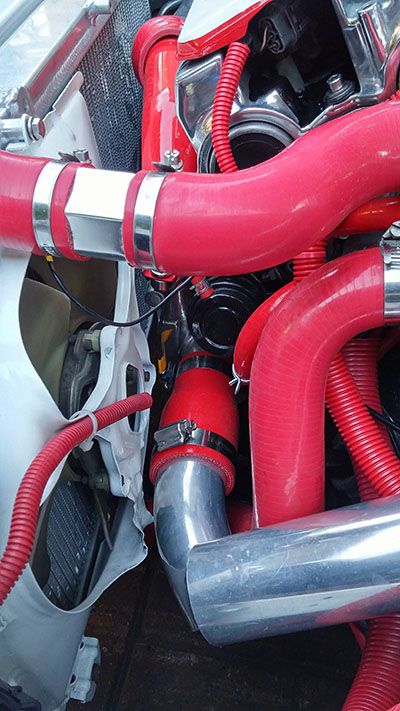
Its all getting a bit tight front and back ...
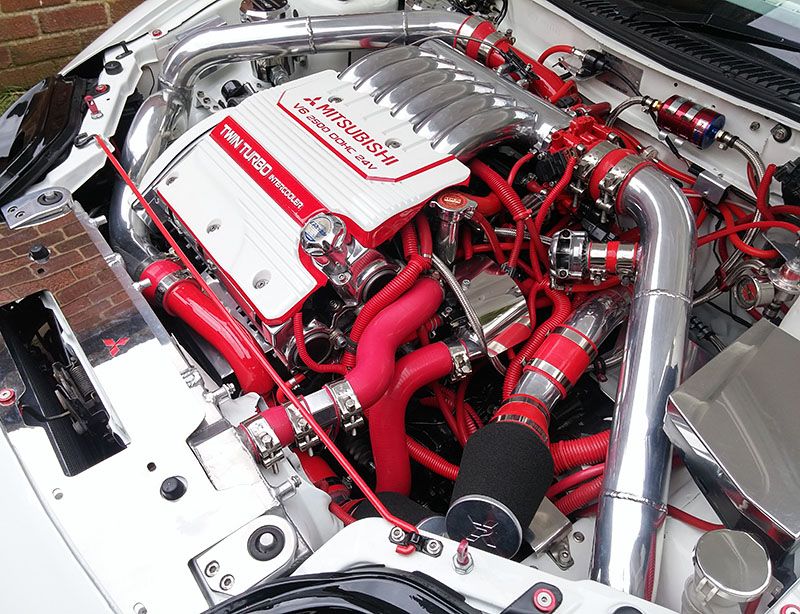
And the finished article, after lots of metal polishing, painting and hose replacements ...
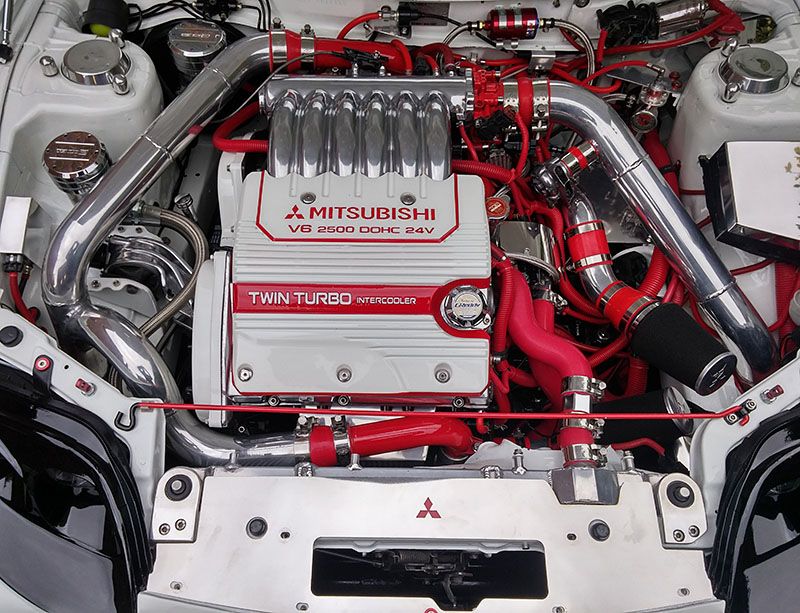
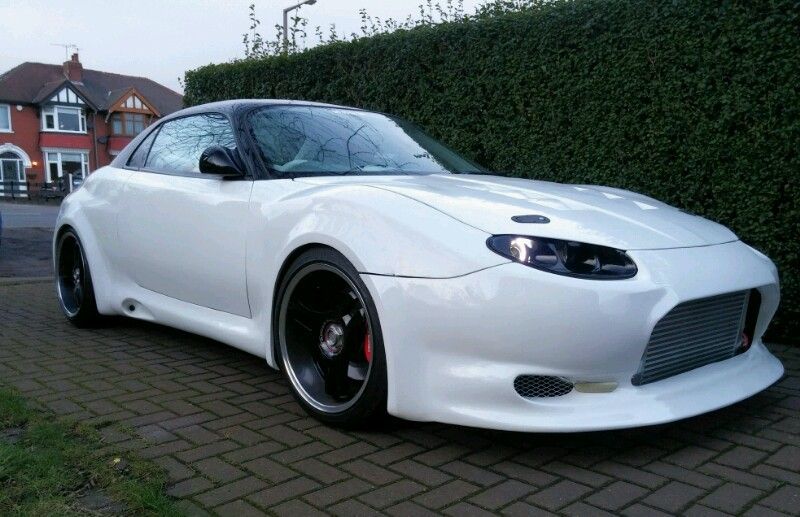
And the vehicle that has been subject to all this torture ...
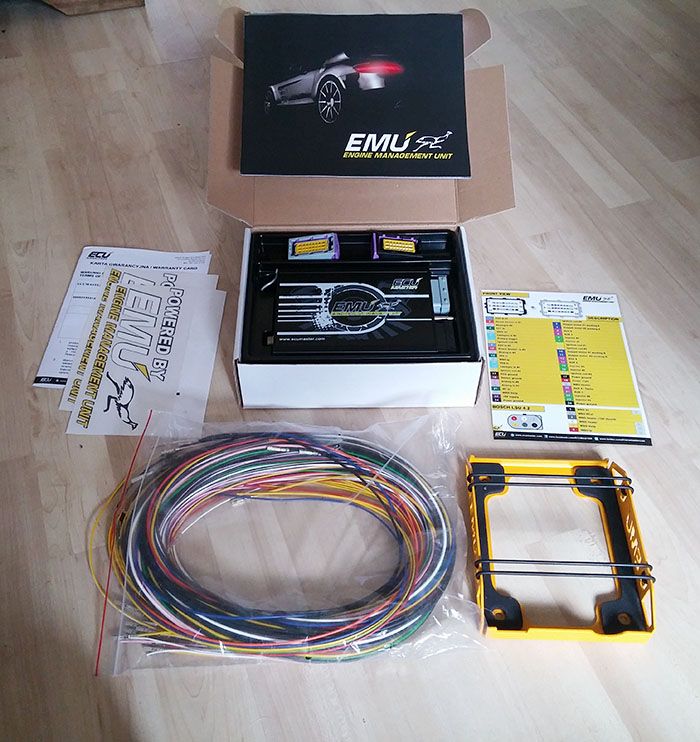
I had an Emanage Ultimate installed on top of the VR4 ECU but had too many issues with it so currently fitting a ECUMaster EMU standalone, a big step for me as up until now I have only had experience fitting piggybacks ...
Re: Project FTO VR4
Posted: Sun Apr 17, 2016 9:07 pm
by dstocks
That there is a fantastic job youve done
Re: Project FTO VR4
Posted: Sun Apr 17, 2016 9:12 pm
by PHIL069
That engine bay is pretty

Pretty f**k'n awesome

Re: Project FTO VR4
Posted: Sun Apr 17, 2016 9:39 pm
by spetz
Really nice work there.
Why did you drop the engine by 6mm? For clearance?
Re: Project FTO VR4
Posted: Sun Apr 17, 2016 10:32 pm
by dazjb
Cheers folks. Yep, the VR4 engine sits 10mm higher than the FTO so needed to drop it a touch. Clearance was worse for mine due to aftermarket bonnet, that's why i milled down the plenum as well.
Re: Project FTO VR4
Posted: Sun Apr 17, 2016 10:55 pm
by Daniel2019
f**k yeah looks great.
How did you go about your bay respray? Currently doing it to my car now.
Re: Project FTO VR4
Posted: Sun Apr 17, 2016 11:38 pm
by bjk
More shiny than I could ever be bothered making my engine bay! Nice work.
Re: Project FTO VR4
Posted: Mon Apr 18, 2016 6:01 am
by aza013
Re: Project FTO VR4
Posted: Mon Apr 18, 2016 7:15 am
by dazjb
Daniel2019 wrote:How did you go about your bay respray? Currently doing it to my car now.
Respraying the bay is a doddle with the engine out ... give it a good clean up, key the surface with wet & dry or scotch pad, etc., mask off where you don't want the spray to go then lay down some paint
Re: Project FTO VR4
Posted: Mon Apr 18, 2016 11:34 am
by Bennoz
Looks mint.
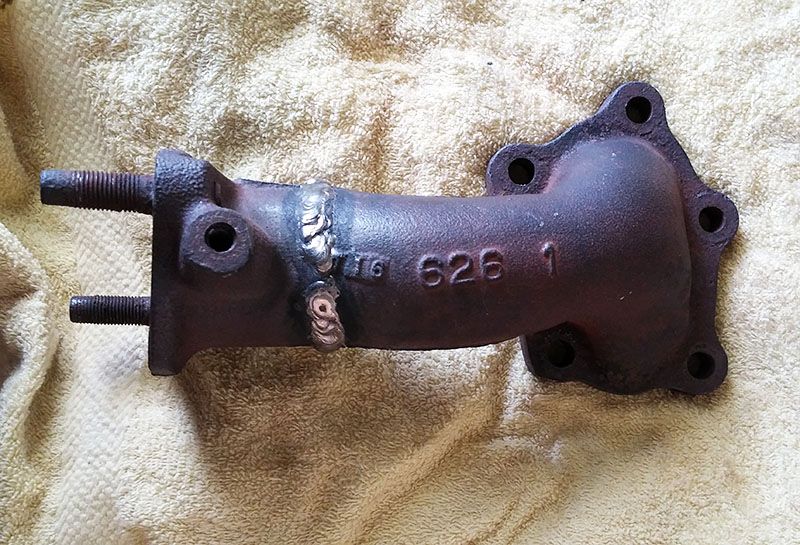
Had any problems with welding the cast iron dumps?
Re: Project FTO VR4
Posted: Mon Apr 18, 2016 6:01 pm
by Daniel2019
dazjb wrote:Daniel2019 wrote:How did you go about your bay respray? Currently doing it to my car now.
Respraying the bay is a doddle with the engine out ... give it a good clean up, key the surface with wet & dry or scotch pad, etc., mask off where you don't want the spray to go then lay down some paint
Yeah my paint was rattle-canned over so I have to sand all the black paint back to get to original white/primer. Bit of a pain.
But yeah looks awesome, good job.
Re: Project FTO VR4
Posted: Mon Apr 18, 2016 7:13 pm
by Astron_Boy
Angry eyes!!!!
Love it!
Re: Project FTO VR4
Posted: Mon Apr 18, 2016 9:51 pm
by dazjb
Bennoz wrote:Had any problems with welding the cast iron dumps?
My mate does the welding for me, him and his old man own an engineering shop. He warmed the two pieces up, welded them together then wrapped them up in a thick blanket and let them cool down really slowly. No cracking and saved him a job not having to make me a custom turbo elbow.
Re: Project FTO VR4
Posted: Mon Apr 18, 2016 10:10 pm
by Bennoz
dazjb wrote:Bennoz wrote:Had any problems with welding the cast iron dumps?
My mate does the welding for me, him and his old man own an engineering shop. He warmed the two pieces up, welded them together then wrapped them up in a thick blanket and let them cool down really slowly. No cracking and saved him a job not having to make me a custom turbo elbow.
Fair enough. I had a new stove pipe manifold made up, didn't want to risk it. Was able to reuse the dumps.
And what about the gear linkages? I wrapped mine like that & couldn't even bend them enough to reach the box lol. Had to individually wrap them.
Re: Project FTO VR4
Posted: Tue Apr 19, 2016 12:34 am
by dazjb
Funny you should mention that, its got a lot harder to engage a couple of the gears since I've wrapped them. Think I'm going to have to unwrap them then redo single as well, going to be a tw@t of a job with the engine, etc. in place.
Re: Project FTO VR4
Posted: Tue Apr 19, 2016 9:11 am
by Bennoz
It sure is
Re: Project FTO VR4
Posted: Sun Aug 21, 2016 7:19 am
by dazjb
Just to update. Standalone ECU is now installed and car has been tuned. For the first tune running 1bar we managed 271bhp and 313 ft/lb of torque at the hubs .. tuning was done on a hub dyno. Had to seriously richen up the AFR's over 6k RPM to prevent knock which dropped the bhp and torque high up in the rev range. Need to do some digging into this.
For now though I have a quick FTO which as a consequence has an insane amount of torque steer. I've had to drop the boost on the AVCR by 50% in 1st gear and 40% in 2nd gear and still have to feather the throttle to get traction!
Re: Project FTO VR4
Posted: Sun Aug 21, 2016 12:47 pm
by bjk
Ah yes, torque steering towards the nearest tree or power pole. Something Bennoz is intimately familiar with.


