Build Overview
Hi All, Welcome to my 1998 FTO GPX build thread.
I have always really liked the 1996 - 2000 Era of Mirage's, Lancers and FTO's. I have previously owned a 4G93 Mirage, 4G69 Mirage and 4G69 Lancer that I have raced with at drag racing and track events as a hobby. I have always wanted to modify a FTO into a decent time attack build setup which is what I would like to show here. I purchased the car in September 2019.
Expectations
In terms of the build and my expertise (lack there of lol), things will be done to the best of my abilities and to the budget I have available. I'm literally posting this up as the corona virus is beginning in Australia, so this will be a slow progress build as funds allow and this is very much a hobby for myself.
Thanks for stopping by, supern0va.
Build Index
1) Modifications List
2) Performance and Records
3) Random Pictures
supern0va's 98 FTO GPX Build
Moderators: IMC, Club Staff
-
supern0va
- Apprentice
- Posts: 23
- jedwabna poszewka promocja
- Joined: Mon Sep 23, 2019 5:43 pm
supern0va's 98 FTO GPX Build
Last edited by supern0va on Tue May 12, 2020 8:29 pm, edited 9 times in total.
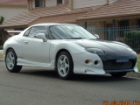
1998 GPX White Manual
-
supern0va
- Apprentice
- Posts: 23
- Joined: Mon Sep 23, 2019 5:43 pm
Re: 1998 GPX Time Attack Build
Modifications List
Engine
- 6A12 Mivec
- Intake, Standard Throttle Body -> 3Inch Short Ram Intake -> BLOX 3inch Short Velocity Stack Air Filter.
- Factory Headers -> 3inch High Flow Cat -> 2.5inch Catback -> Invidia Muffler with 3inch Tip
- Factory ECU
Drivetrain
- Standard GPX Manual Gearbox
- Open Diff
- Standard Driveshafts
- Standard Flywheel and Clutch.
Brakes & Suspension
- DGR Coilovers
Wheels & Tyres
- Standard 16x6.5inch GPX Wheels, repaired and balanced with 205/50/16 RE003's all around.
Interior
- Standard Momo Steering Wheel
- Standard FTO Cluster
- Standard Front and Rear Seats.
- Ralliart Evo 4/5/6 Gearknob
- Standard Shifter
Exterior
- Scotia White Color
- Standrd Front Bar, Side Skirts and Rear Bar.
- Optioned GP Version R Spoiler
- Optioned Rear Wiper, Removed replace with plug.
- Optioned HID Headlights.
- Non-tinted Windows.
Weight Reduction, Savings in kg
- 20kg - Complete Air Conditioning System (Compressor, Condenser, Lines etc)
- 10kg - Power Steering Systems (Pump, Lines, Reservoir etc)
- 13kg - MEGALife Lithium Battery - MR20 730CCA (Battery that came with car was 15KG. Replaced with 2.3KG Lithium)
- 10kg - Audio Delete (Front and Rear Speakers, Head Unit, Antenna, Stock Amp, all wiring)
- 2kg - Rear Wiper Removal
- 8kg - Sound Deadening, Rear Boot Area, Middle Area under seats and carpet.
- Also little brackets and bolts which I don't really measure.
Total Weight Removed = Approx 65KG.
Vehicle Weight = 1125KG With full tank of fuel.
Last edited by supern0va on Wed May 13, 2020 8:02 pm, edited 11 times in total.
1998 GPX White Manual
-
supern0va
- Apprentice
- Posts: 23
- Joined: Mon Sep 23, 2019 5:43 pm
Re: 1998 GPX Time Attack Build
Performance and Records
Drag Racing 1/4 Mile
Current Personal best - 14.968 @ 94.41 Mph
Vehicle Weight - 1130kg including full tank fuel.
Luddenham Raceway
No Timing as yet.
Wakefield Park Raceway
No Timing as yet.
Sydney Motorsport Park
No Timing as yet.
Drag Racing 1/4 Mile
Current Personal best - 14.968 @ 94.41 Mph
Vehicle Weight - 1130kg including full tank fuel.
Luddenham Raceway
No Timing as yet.
Wakefield Park Raceway
No Timing as yet.
Sydney Motorsport Park
No Timing as yet.
You do not have the required permissions to view the files attached to this post.
Last edited by supern0va on Sun Apr 12, 2020 4:15 pm, edited 3 times in total.
1998 GPX White Manual
-
supern0va
- Apprentice
- Posts: 23
- Joined: Mon Sep 23, 2019 5:43 pm
Re: 1998 GPX Time Attack Build
Random Pictures
You do not have the required permissions to view the files attached to this post.
Last edited by supern0va on Sun Apr 12, 2020 3:17 pm, edited 1 time in total.
1998 GPX White Manual
-
aza013
- NSW Coordinator
- Posts: 9087
- Joined: Mon Mar 26, 2007 5:00 pm
- Location: The Shire
- Contact:
Re: 1998 GPX Time Attack Build
Looking good.
But if you want a cold air intake then you should box it up so your not sucking hot air from the bay.
Good 1/4 time
But if you want a cold air intake then you should box it up so your not sucking hot air from the bay.
Good 1/4 time
-
mezje
- Mechanic
- Posts: 520
- Joined: Wed Mar 11, 2015 12:03 am
Re: 1998 GPX Time Attack Build
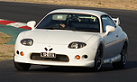
My old car!
-
supern0va
- Apprentice
- Posts: 23
- Joined: Mon Sep 23, 2019 5:43 pm
Re: 1998 GPX Time Attack Build
Thanks for the replies 
Yes Mezje im keeping the dream alive lol
Yes Mezje im keeping the dream alive lol
1998 GPX White Manual
-
supern0va
- Apprentice
- Posts: 23
- Joined: Mon Sep 23, 2019 5:43 pm
Re: 98 GPX Time Attack Build
Update - 12/05/2020
I took the car off the road about 1 month ago just after the major lockdown. I used that time to do a few thing which ive been meaning to do. To summarise some of the things:
1) Sound Deadening, I removed all of the interior seats, carpets, plastics to see what was where. I intially thought to use a heatgun and take my time doing this as I was in no rush. Over about the course of 2 hour's I had removed most of the tar in once section (under the passenger seat rear) with all of the residue left over. I then hit it with WD40 to loosen up the material and a nylon brush to work the tar so you can wipe it away.
this took forever and everything got messy. Ive done this many times before and ive always used dry ice but i tried to save myself some monies as i had ample time but alas dry ice was the best way to go.
All up I had to buy 6KG of Dry ice at a cost of $11.50 a Kilo which cost $69. This dramatically sped up the process and made the tar material come off with ease. There are parts of the bottom part of the car which also have a glue substance different to the tar, this is much harder to get off but with some heat this comes off easily.
I dont have any pics as i was getting too anxious to put everything back together and pics get in the way of the flow.
All up I removed the sound tar material from the boot area, rear wheel wells, inside wheel wells, under rear seats, under passenger and drivers side seats and some in the middle. All up material came in about 10KG.
I am yet to remove the material located on the firewall and fully clean all tar from absolutely everywhere as it takes forever. I think there is another 5KG to remove.
I drove the car this afternoon and its a little but louder but not too bad then what it was before.
2) fixed up the wiring in the center console area. I removed the spliced in audio connector for a headunit as I wont be using one. heatshrink the cut wires togeether and made it neat so no shorts would occur.
3) removed the antenna wire that runs from the audio unit area to the left underside of the rear plastic to the roof section. this cleans it up a bit, surprisingly this wire weighed 250g. on the rear right hansdie under the plastic there is a small (what i believe to be) a standard mitsu amplifier. removed that as well, it weighed 200g. plus a small antenna wire connected to it.
4) removed rear wiper hose that runs to the front of the car.
5) repositited air intake. I cut down the piping that attached directly to the TB by about 2 cm. giving a better fit. although what i will end up doing is using a small silicone elblow joiner as that would work a lot cleaner.
6) i replaced my battery ground terminal with a unit slightly smaller so fits better on battery. this saved 20grams haha!
7) installed rear strut brace.
I then put back in all the plastics correctly. Now that the sound tar material has been removed the carpet sits lower this you have to stretch it out a bit more as all of the hole in it line up a little but off center.
still little bits a pieces to do. need to replace my drivers side mount, fix bent cross member and install ralliart mounts. get new bolts for rear suspension as some are stripped.
sorry no further pics
You do not have the required permissions to view the files attached to this post.
1998 GPX White Manual