The Suspension Thread

This forum is for technical discussions on anything that will make your car handle better or go faster.

Moderators: IMC, Club Staff

Post Reply
User avatar
SilentBob
Mechanic
Posts: 480
jedwabna poszewka promocja
Joined: Mon Mar 31, 2003 6:00 pm
Location: Newcastle, NSW, Australia
Contact:

Post by SilentBob »

to get the
SPF1574 Rear Trailing Arm bush(as i just got one myself)

its easier and quicker(and slightly cheaper) to go with a Bursons Autoparts(they stock/resell SuperPro Poly bushes)

$120 direct from SuperPro
$106 from Bursons

its MASSIVE!!! :)
User avatar
jonowong
Oldtimer
Posts: 3420
Joined: Thu Jan 15, 2004 6:00 pm
Location: Sydney

Post by jonowong »

hey i thought the last pic i posted was the tie rod connector :?

confusion attack
User avatar
Bennoz
National President
Posts: 23668
Joined: Fri Jan 21, 2005 6:00 pm
Location: Sydney
Contact:

Post by Bennoz »

jonowong wrote:hey i thought the last pic i posted was the tie rod connector :?

confusion attack
Same thing, different name :wink:
User avatar
jonowong
Oldtimer
Posts: 3420
Joined: Thu Jan 15, 2004 6:00 pm
Location: Sydney

Post by jonowong »

ok i have another issue now :cry:
the bolt i circled in red wont come out... i loosened it half way and then it got stuck so i pulled really hard on my wrench... and it loosened... but now it just spins and wont come off and i wont tighten either.... what do i do now?! my car wont stay straight now....

Image
User avatar
Bennoz
National President
Posts: 23668
Joined: Fri Jan 21, 2005 6:00 pm
Location: Sydney
Contact:

Post by Bennoz »

*puts head in hands & shakes*

Remind me never to buy a car from you! :lol: And FFS dont drive it with that loose!!

Sounds like youve threaded the bolt, you need to get it out enought so that you can get a lever (Like a big flathead screw driver) under the head of the bolt - then continue to try & wind it out at the same time you are levering it out.
User avatar
jonowong
Oldtimer
Posts: 3420
Joined: Thu Jan 15, 2004 6:00 pm
Location: Sydney

Post by jonowong »

:cry:

why do i have such bad luck
User avatar
jonowong
Oldtimer
Posts: 3420
Joined: Thu Jan 15, 2004 6:00 pm
Location: Sydney

Post by jonowong »

just took it to the mechanics and they could get it off with a 2m leverage... :s what now?!
User avatar
Bennoz
National President
Posts: 23668
Joined: Fri Jan 21, 2005 6:00 pm
Location: Sydney
Contact:

Post by Bennoz »

Just adding this DIY to the thread to sorta keep it all in the one place.

Alrighty, here's a guide on replacing shocks and springs - this guide can also be used if you are fitting lowered springs.

Special tools required: A pair of spring compressors (for suspension springs not valve spring compressors.)

I will use 1 front and 1 rear as examples as obviously both fronts and rears are the same.

Note: This job is MUCH more easily done on a hoist, but seing as I have no such luxury, this is aimed at the backyard hack who has a jack!

When replacing shocks - this is what you get. Not just inserts but complete struts:

Image

Front:
First up, jack the car up & remove the wheel, you will be presented with this:

Image

There are 2 x 17mm bolts that join the strut to the wheel hub assembly remove them.

Also remove the clip that holds the brake like into the small bracket on the side of the strut.

Now remove the 17mm nut holding the droplink to the strut side. If you find the entire ball joint of the droplink moving, then use a 17mm ring spanner to grip the flat section on the back of the ball joint - see pic:

Image

Then remove the 3 x 14mm nuts that hold the strut into the engine bay (see pic) - note: your strut tops may look a little different to mine. Standard ones are black circular rubber units rather than the adjustable ones pictured. On standard strut tops there will be a black plastic caps that hides the central nut - now is a good time to loosen that nut - BUT DO NOT REMOVE IT COMPLETELY. It will unspring the whole assembly.

Take care undoing the last 14mm nut - the strut will want to fall out. Hold it with one arm as you undo the last nut:

Image

Now the strut should come out (with some manouvering) and you should attach your spring compressors & begin compressing the spring:

Image
Image

Once the spring is compressed (ie no longer pushing hard up against either end of the spring seat) you can now undo the central nut you loosened earlier:

Image

Once that nut is removed, the whole strut assembly can be pulled apart. The strut top will come off first, then remove the spring (with spring compressors attached) then the bump stop and plastic casing will slide off the old shock:

Image
Image
Image
Image

And you'll be left with the above ^

Reassembly is is the exact opposite to disassembly. Put the bump stop and case onto the new shock, then the spring (with spring compressors still attached), then the top cap, then the strut top. At this time you may wish to clean the join between the top cap & the strut top & regrease - as it is the joint that swivels when you turn the steering wheel.

Also note: If you are fitting lowered springs, now is the time to change them. Remove the spring compressors from the old springs (whilst they are off the assembly) and attach the compressors to your new springs - put them on the assembly with the compressors attached. Then refit all the other parts in the same order you removed them.

Replace the central nut and tighten as much as you can by hand to complete the new assembly and remove the compressors:

Image
Image

Insert the assembly back into the car. First up hold it in & put on the 3 top nuts, then you can put in the 2 x 17mm bolts that hold the strut to the hub, then re-attach the droplink & the brake line. Once its all bolted back on solid, tighten up the top central nut & replace the centre cap (if you have standard strut tops.)

Image
Image
Image

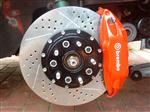
Oh, and I touched up my caliper paint whilst I was in there..... :P

Okay - now for the rears! Please excuse the photo quality, it was getting quite dark at this point in time.

First up, open the boot & move the padding on the rear arches. Underneath you will find this:

Image

Again - loosen up the centre nut. You'll find that the whole shock wants to rotate, so use a shifter to grab the small flat section on the very top of the shock & hold it whilst you loosen the centre nut. Once loose, undo the 2 x 14mm nuts that hold the shock to the car. Again DO NOT remove the nut altogether, that would release the whole asembly.... *Boing!*

Now remove the 17mm bolt that holds the assembly to the lower control arm:

Image

The whole strut assembly will now drop down as far as it can go to the lower control arm. If you had a hoist - at this time you could pry the lower control arm down far enough to remove the strut, but I had a jack & that was not possible. I had to disassemble the strut in-car & reassemble in-car.....

Compress the spring using your spring compressors with the strut loose (but still in the car) like so:

Image

Once you have compressed the spring, you can now remove the already loosened centre nut. You can then remove the top mount, the top spring cup, and eventually remove the spring & bump stop. This is a bit of a juggle in car as you can see by the pics. You can see the lower part of the shock hanging down throught the control arm. Its the only way you can get enough clearance to remove the spring & other bits from it:

Image
Image

You can see here all the parts from the strut removed in order from left to right. Once the shock is on its own resting on the lower control arm in-car, you can then compress it by hand enough to remove it.

Image

You then need to do the same to the new shock to put it in. It needs to be placed through the rear arm to be resting as per the above pic as well.

Re-assembly is done in the reverse order as above. If changing springs, now is the time to remove the compressors from your old spring, apply them to the new spring and place it back on the new shock (in-car) and continue to re-assemble the strut as per the reverse of dis-assembly.

Pic of reassembled strut bolted back in:

Image

The best way to raise the shock back into its original position is to use a hydraulic trolley jack. This also makes is possible to line up the lower mount of the shock to the lower control arm well enough to feed the 17mm bolt back thru!

Now - before you get all excited and go for a test floggin' around the block, the first drive you should take it on is to the nearest place that can wheel align the car properly!!!

In a majority of cases your wheel alignment will be out to the sh*t house... even to a dangerous point. First thing you should do is get that sorted.

Part number for the new shocks:

Front L: 334154 $135 each
Front R: 334155
Rears: 341140 $67 each

Available from Precision Auto spares: 02 93166800.
They are KYB Gas Shocks
User avatar
I8A4RE
QLD Coordinator
Posts: 9594
Joined: Mon Aug 28, 2006 5:00 pm
Location: BOOSTIN in front of you
Contact:

Post by I8A4RE »

NEED help, i need new front shocks (i just brought lowered king springs 2 wks ago). the local repco guy is tellin me $580 for inserts that ill have to get some to fit to my origanal ones (didnt even know u could that ) what brand and who sells tham any help pleaseeeeeeee
CHRISTIANITY: The belief that a cosmic Jewish Zombie who was his own father can make you live forever if you symbolically eat his flesh and telepathically tell him you accept him as your master, so he can remove an evil force from your soul that is present in humanity because a rib-woman was convinced by a talking snake to eat from a magical tree...
mxysxy
Oldtimer
Posts: 1905
Joined: Wed Aug 18, 2004 5:00 pm
Location: Melbourne
Contact:

Post by mxysxy »

I8AFRE wrote:NEED help, i need new front shocks (i just brought lowered king springs 2 wks ago). the local repco guy is tellin me $580 for inserts that ill have to get some to fit to my origanal ones (didnt even know u could that ) what brand and who sells tham any help pleaseeeeeeee
told you mate,
RPW sells KYB's for $500, thats a full set of 4 shockers, not inserts,
http://www.rpw.com.au/shop/

Dont go to repco, they rip you off big time
User avatar
I8A4RE
QLD Coordinator
Posts: 9594
Joined: Mon Aug 28, 2006 5:00 pm
Location: BOOSTIN in front of you
Contact:

Post by I8A4RE »

told you mate,
RPW sells KYB's for $500, thats a full set of 4 shockers, not inserts
what do the handle like? does any know what g4 racing coilovers are like i found them for $1399 on ebay
http://cgi.ebay.com.au/G4-RACING-COILOV ... dZViewItem
CHRISTIANITY: The belief that a cosmic Jewish Zombie who was his own father can make you live forever if you symbolically eat his flesh and telepathically tell him you accept him as your master, so he can remove an evil force from your soul that is present in humanity because a rib-woman was convinced by a talking snake to eat from a magical tree...
User avatar
dannyboyau
Veteran Mechanic
Posts: 979
Joined: Sat Sep 28, 2002 5:00 pm
Location: that speck disappearing in the distance

Post by dannyboyau »

Bennoz wrote: Part number for the new shocks:

Front L: 334154 $135 each
Front R: 334155
Rears: 341140 $67 each

Available from Precision Auto spares: 02 93166800.
They are KYB Gas Shocks
$404 for a set of shocks is that right bennoz
User avatar
Bennoz
National President
Posts: 23668
Joined: Fri Jan 21, 2005 6:00 pm
Location: Sydney
Contact:

Post by Bennoz »

dannyboyau wrote:
Bennoz wrote: Part number for the new shocks:

Front L: 334154 $135 each
Front R: 334155
Rears: 341140 $67 each

Available from Precision Auto spares: 02 93166800.
They are KYB Gas Shocks
$404 for a set of shocks is that right bennoz
Plus GST and freight it ended up costing me $491 all up delivered to my front door.
User avatar
khunjeng
Oldtimer
Posts: 4455
Joined: Mon Oct 24, 2005 5:00 pm
Location: Melbourne, Victoria

Post by khunjeng »

just in case anyone is intrested...I replaced my rear drop-links and sway-bar bushes this morning... fronts next week.

pics

Image
Image
Image
Image
User avatar
Liquidity
Grease Monkey
Posts: 221
Joined: Sun Sep 03, 2006 5:00 pm

Post by Liquidity »

SPF1500 Front Control Arm Lower - Rear Bushing

If front control arm bushes are done - this one must be done using the same density material. Available in both stock size & positive castor type. The superflex type only give 0.5 degrees positive castor. Where as the Whiteline ones give 1.0 degrees. Part number KCA317A
Just in case people get confused/local whiteline dealer doesnt think they've got fto parts, thats the SAME model number bush as i bought for the CE lancer's front lower rear control arm bushing.
Also the same model number that appears in a parts breakdown for the CE lancer i've got here (sheet from whiteline).

In other words, just ask for the CE lancer item if theres confusion. :P

edit : oh yes, and you should probably mask rotors when applying high temperature paint :/
User avatar
Bennoz
National President
Posts: 23668
Joined: Fri Jan 21, 2005 6:00 pm
Location: Sydney
Contact:

Post by Bennoz »

Bah, 2 hot laps round the block & that comes off
User avatar
Nacho
Oldtimer
Posts: 2087
Joined: Mon Jul 11, 2005 5:00 pm
Location: Melbourne

Post by Nacho »

How did you get your front lower control arm to sit on the grass like that? Does the ball joint need to be loosened to do that?

And how did you get the contol arm bushes to come off? Mine won't seem to budge... :oops:
You never get a second chance to make a first impression.
User avatar
Liquidity
Grease Monkey
Posts: 221
Joined: Sun Sep 03, 2006 5:00 pm

Post by Liquidity »

some people use a vice. I use a hammer :twisted:
User avatar
Bennoz
National President
Posts: 23668
Joined: Fri Jan 21, 2005 6:00 pm
Location: Sydney
Contact:

Post by Bennoz »

The ball joint isnt undone. The arm is just resting off it.

If you need to split the ball joint, these are the best things to use:

Image

Put it around the joint & bash with large hammer!
User avatar
Nacho
Oldtimer
Posts: 2087
Joined: Mon Jul 11, 2005 5:00 pm
Location: Melbourne

Post by Nacho »

So what do I need to get the bushes off?

And yes you've answered my other question. You can lower the arm while the ball joint is still in place. Do I have to force downwards to actually lower it? It won't seem to budge! :oops:
You never get a second chance to make a first impression.
Post Reply