Page 3 of 18
Re: Robs new project Supercharger
Posted: Tue Dec 20, 2011 4:25 pm
by Rob Furniss
Eltnot wrote:Too much effort to just tap out a larger bolt size?
It's a shame but I think so.
The bolt holes in the intake pipe flange look like brass hexaganol shapes pressed into the plastic so would probably have to press them out, put them in a vice and then drill and tap them - if there would be enough material left too, and then press them back in and hope they hold in the plastic. May actually be easy but I don't want to ruin it.
I think a thinner bolt with a sleeve will be easier.
Re: Robs new project Supercharger
Posted: Tue Dec 20, 2011 6:18 pm
by Eltnot
Fair call, if it's going to be a bastard, much simpler and easier to go with the sleeve.
Re: Robs new project Supercharger
Posted: Sat Jan 07, 2012 8:47 pm
by Technikhaus
Any updates on this at all?
Re: Robs new project Supercharger
Posted: Mon Jan 09, 2012 3:43 pm
by Rob Furniss
Er, not realy, bit of a delay due to xmas and i'm moving house this weekend but will be back on after that, the new place has a powered workshop so looking forward to having more space to work.
My Bernzomatic TS8000 torch has arrived and my ally brazing rods and i've just picked up some mapp gas so once i've moved house i'm going to start practising with these rods ready for when my air/liquid charge cooler core gets here from the states.
Re: Robs new project Supercharger
Posted: Mon Jan 09, 2012 3:59 pm
by Technikhaus
Awesome!
Was hoping this wouldn't be another dead Project like lots around here

Have fun with the move!

We moved over to NZ recently from Aus... was hectic!
Robs new project Supercharger
Posted: Mon Jan 09, 2012 4:12 pm
by bass_twitch
But besides all that,
You will bring the finished beast to the bonfire in April won't you ;p
Re: Robs new project Supercharger
Posted: Mon Jan 09, 2012 4:23 pm
by Astron_Boy
bass_twitch wrote:But besides all that,
You will bring the finished beast to the bonfire in April won't you ;p
He'd be the first WA'er to go that distance...
Technikhaus wrote:Awesome!
Was hoping this wouldn't be another dead Project like lots around here
Have fun with the move!
We moved over to NZ recently from Aus... was hectic!
Difference is Rob has done this before, so he knows most of the hurdles before he gets to them.
Re: Robs new project Supercharger
Posted: Mon Jan 09, 2012 6:35 pm
by Rob Furniss
bass_twitch wrote:But besides all that,
You will bring the finished beast to the bonfire in April won't you ;p
I would love to, lets see if I can finish it for then - even if I don't manage to bring her across to the bonfire it gives me a date to aim for.
Re: Robs new project Supercharger
Posted: Sun Jan 22, 2012 9:11 pm
by Rob Furniss
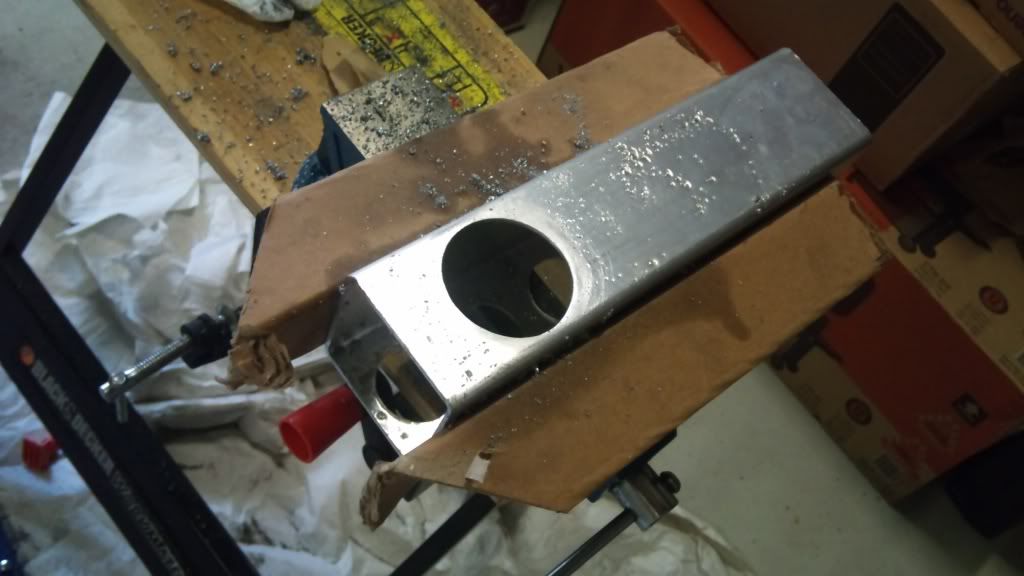
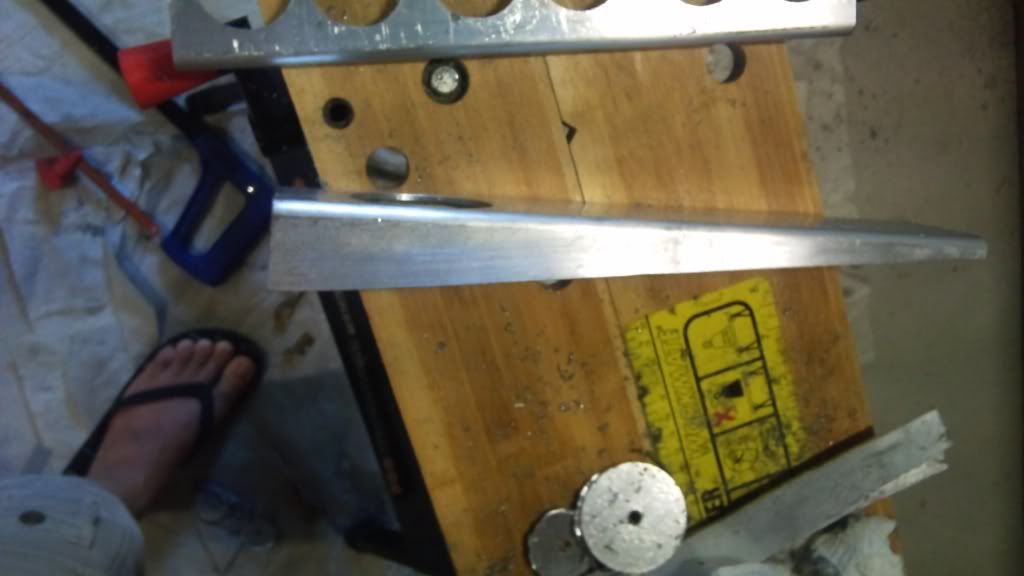
Ok spent about an hour in the new workshop today, made a start on the custom plenum with integrated charge cooler. liquid/air core is on order from bell intercoolers and i'm hoping to get the CC finished within the next two weeks depending on when it arrives and how much time I decide to spend in the pool.
Here's a few pics:
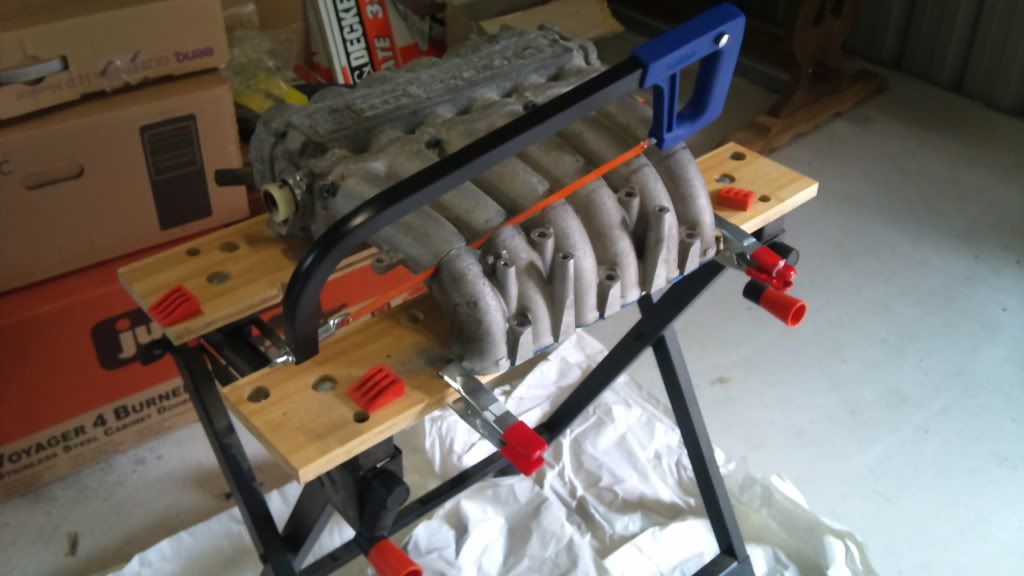
A bandsaw would have been nice.
Here's some materials for the next phase
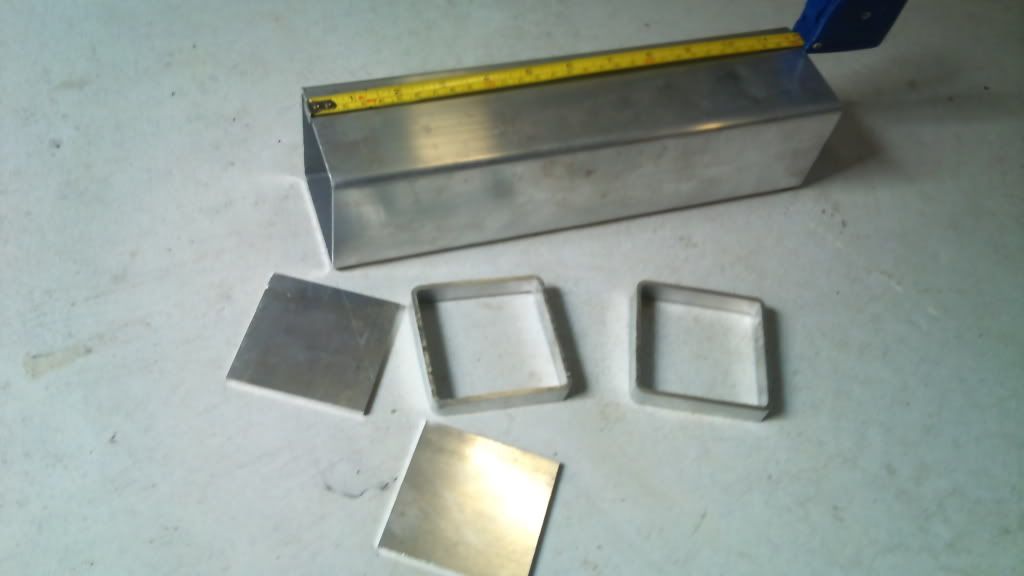
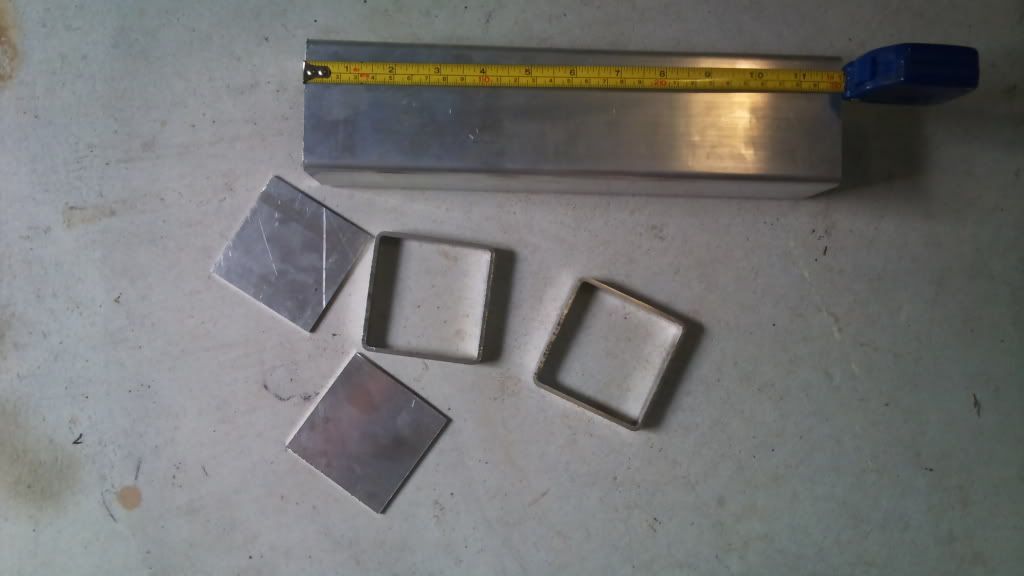
Couldn't do any more with them as I need to get a hole saw set from bunnings or tool mart first.
Re: Robs new project Supercharger
Posted: Sun Jan 22, 2012 10:42 pm
by Eltnot
How many brews were consumed whilst you cut through that?
Re: Robs new project Supercharger
Posted: Sun Jan 22, 2012 10:48 pm
by Rob Furniss
Eltnot wrote:How many brews were consumed whilst you cut through that?
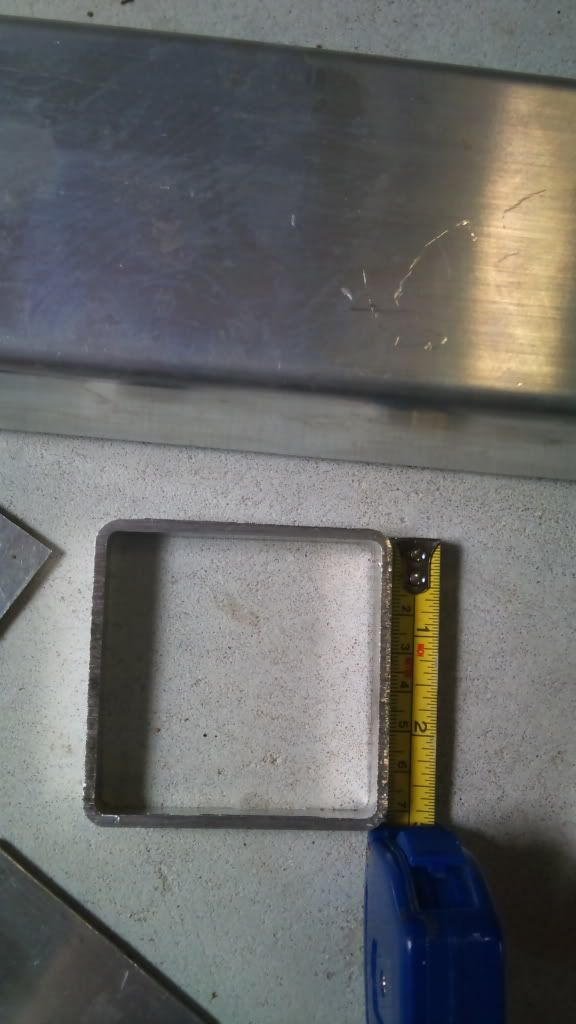
Haha, none mate although it was a pita.
Plenum is almost 300mm wide at that point and my saw had a 300mm blade, oops didn't see that one coming.
Re: Robs new project Supercharger
Posted: Sun Jan 22, 2012 10:57 pm
by Kustom
That sucks. Nice cut though !
Re: Robs new project Supercharger
Posted: Tue Jan 24, 2012 8:38 am
by Astron_Boy
Neat, nice progress.
Can't wait to see the box welded to the runners.
Re: Robs new project Supercharger
Posted: Tue Jan 24, 2012 8:00 pm
by Rob Furniss
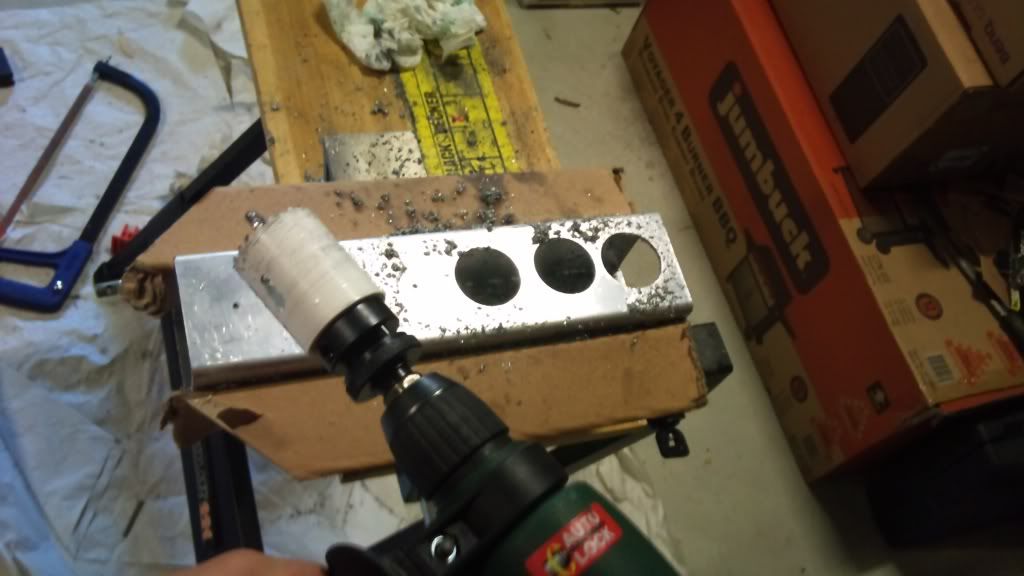
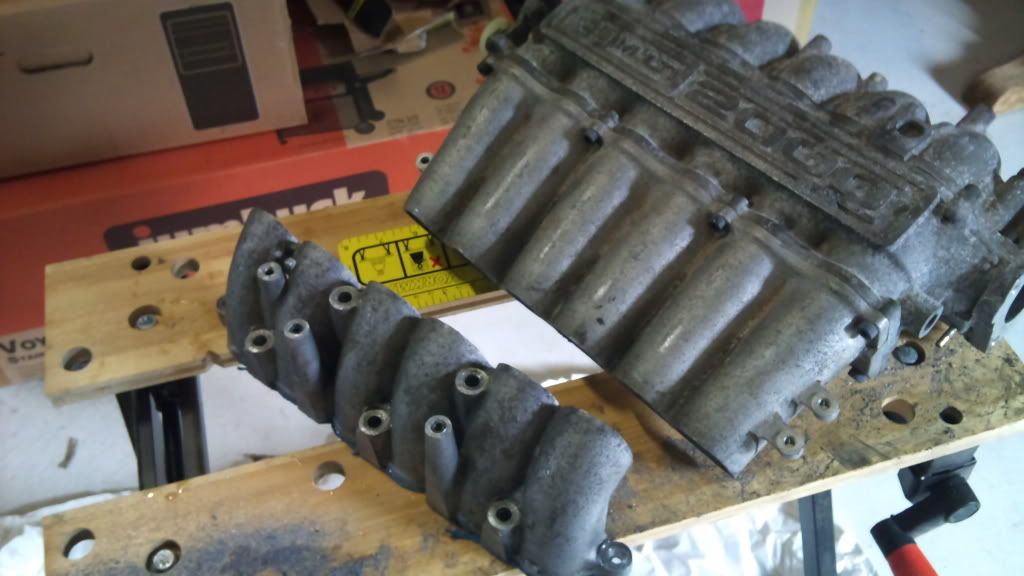
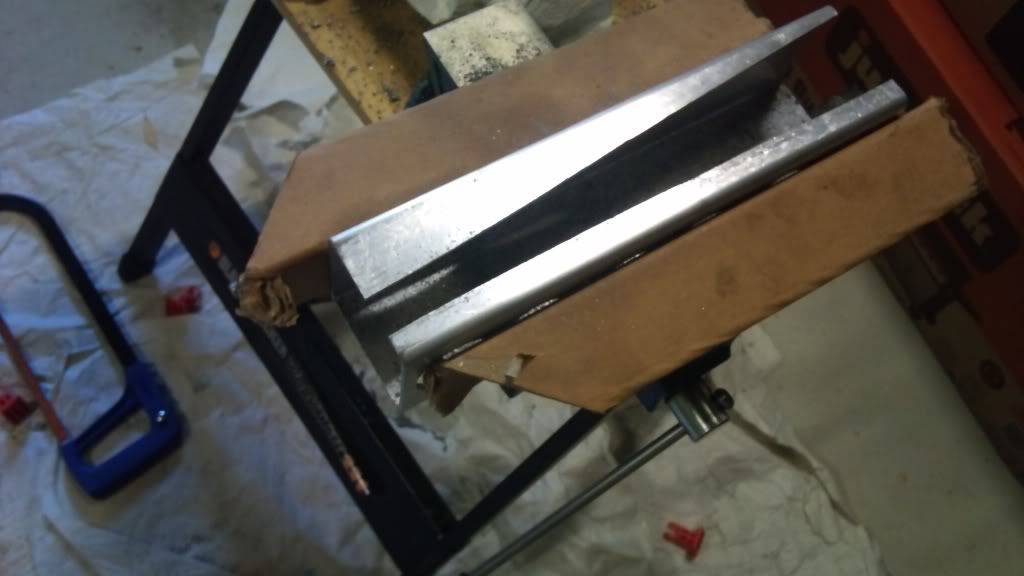
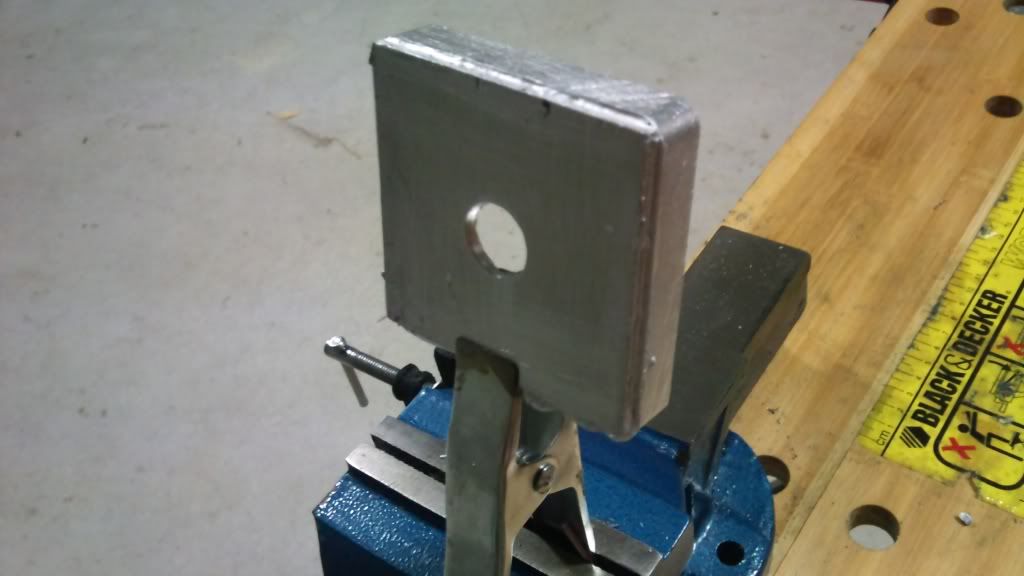
Seems the holes aren't exactly where they should be but i've put the cut down plenum up to them and it's still within limits, i've got a bit of filing to do to open them out a bit more anyway.
Next step is cutting the box section to separate the two drilled faces, these will then be welded to the liquid/air core to make the end takes for the air in and out.
So far i'm really enjoying the project
Re: Robs new project Supercharger
Posted: Wed Jan 25, 2012 4:18 pm
by Rob Furniss
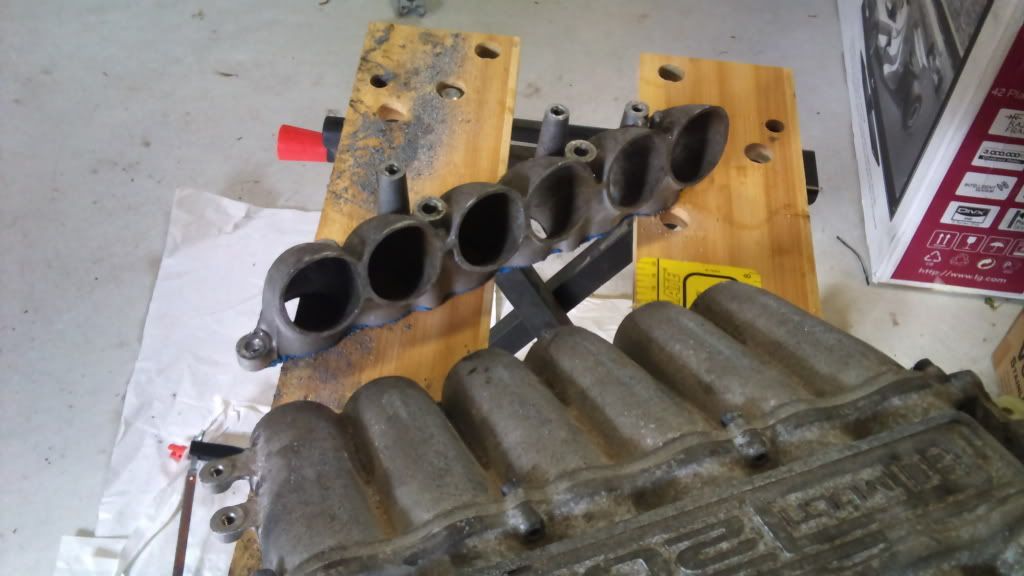
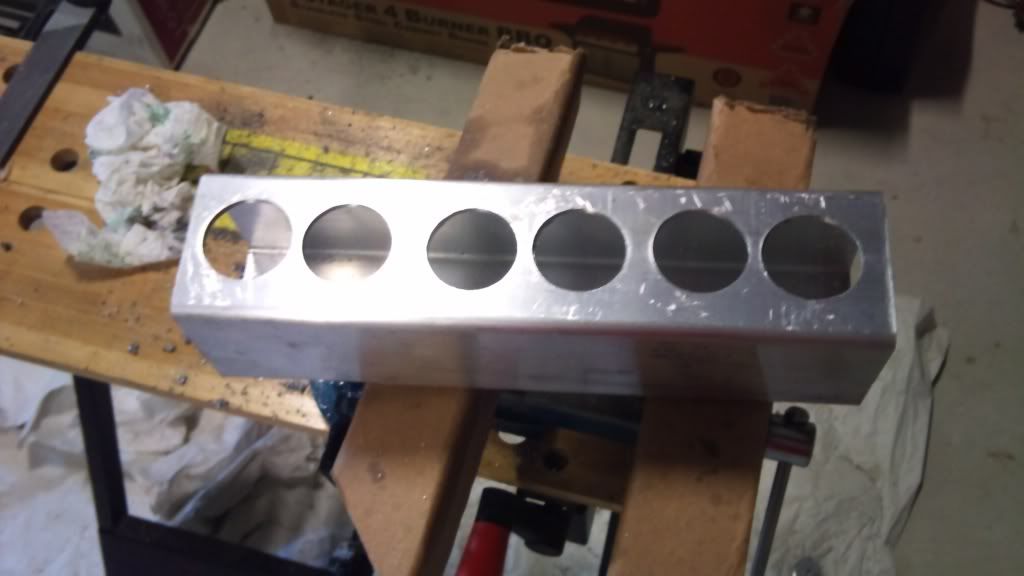
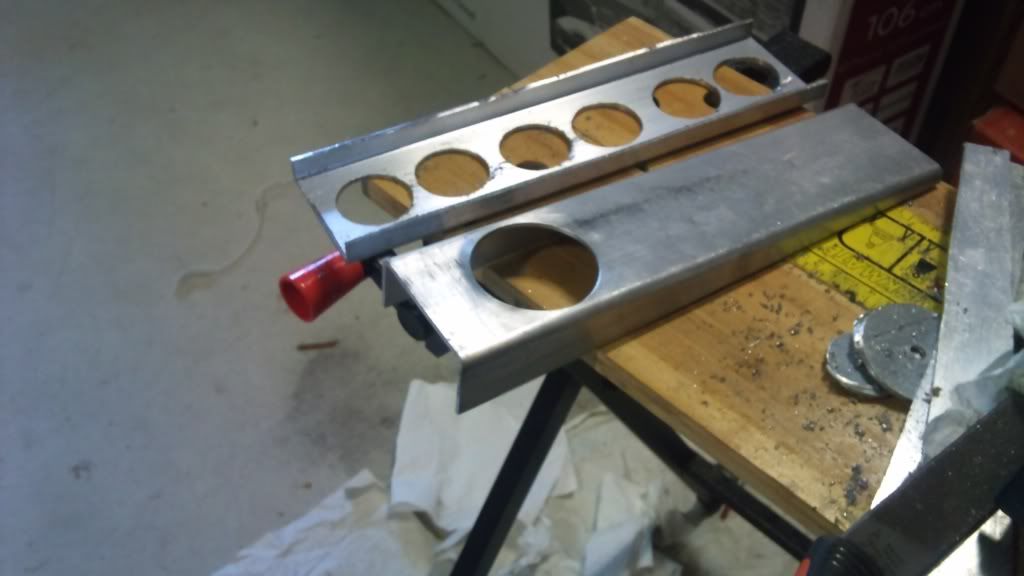
Still on with the charge cooler/plenum:
I used the jigsaw this time, much easier although had a lot of vibration due to the cut materials bouncing up and down.
Note the safety footwear - not really, I did have safety glasses on though.
Re: Robs new project Supercharger
Posted: Wed Jan 25, 2012 4:32 pm
by Taz
Nice Jandals Bru!
Re: Robs new project Supercharger
Posted: Wed Jan 25, 2012 10:00 pm
by Astron_Boy
Ahh, I see, so you're welding it in ... 4 parts this way?
Was wondering how you were going to do it.
Safety gear is for chicks with nothing on underneath it!
Re: Robs new project Supercharger
Posted: Wed Jan 25, 2012 11:08 pm
by Rob Furniss
Sloping one with the big hole will be at the top taking air in from the charger.
Liquid/air core will be welded to that and sit in the middle
channel with 6 holes will be welded to the bottom of the liquid/air core to add room for the air to disperse through the 6 holes, needed a bit of a buffer as a flat plate with 6 holes would have been no good.
Plenum welded to the face of the 6 holed channel if that makes sense.
Re: Robs new project Supercharger
Posted: Thu Jan 26, 2012 11:48 am
by Rob Furniss
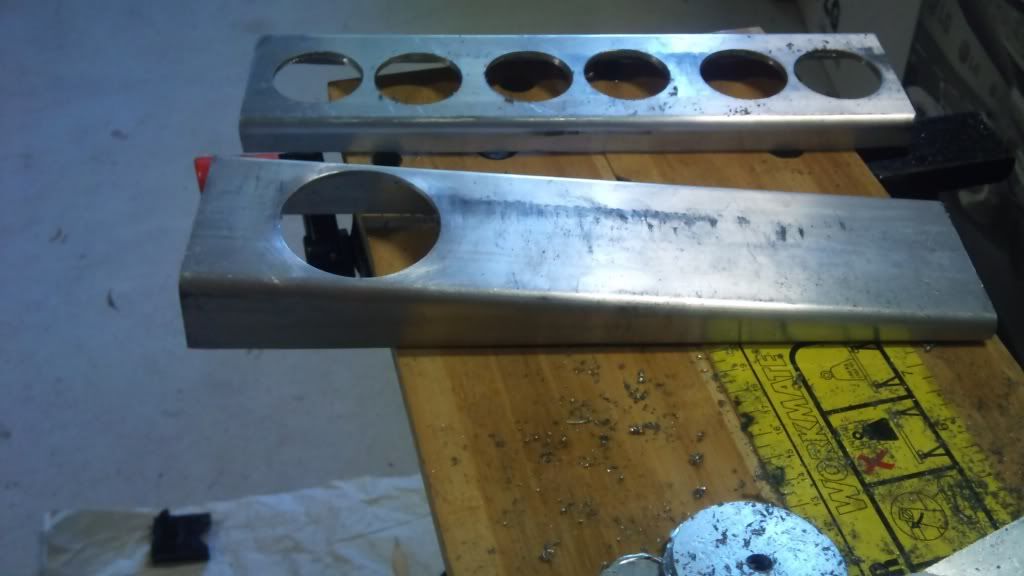
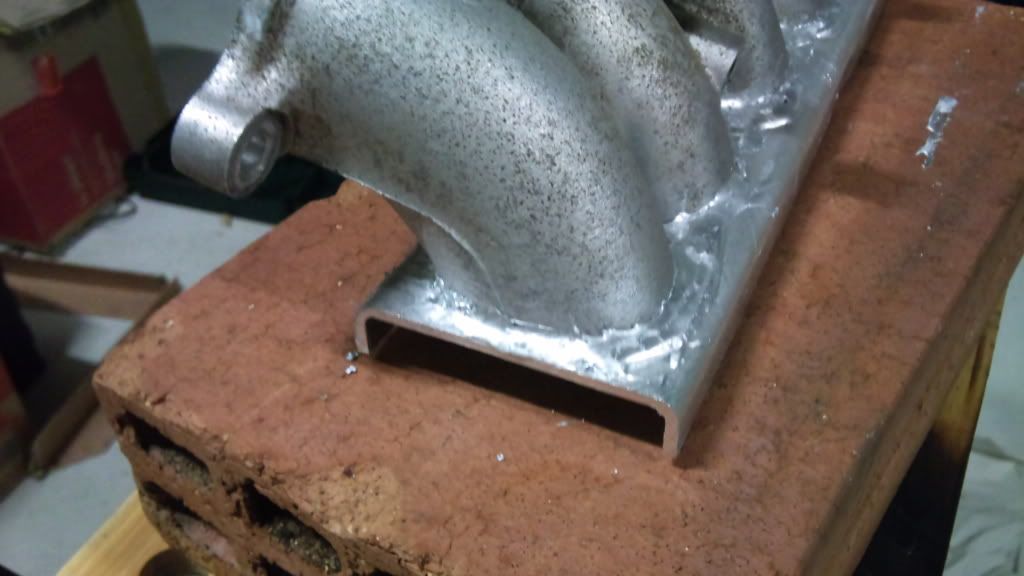
My first go at welding with mapp gas and techni2000 rods, not as easy as I thought but I think i'm getting the hang of it.
This is one of the end tanks for the water side of the liquid/air charge cooler, this was easy compared to the plenum (I welded/brazed it inside as well as out).
And my first attempt at the plenum, this was much more difficult and one of the problems i'm having is clamping the damn thing, also getting enough heat into it - the vice isn't helping as it's acting like a heak sink. Anyone who's done stuff like this before tips are appreciated.
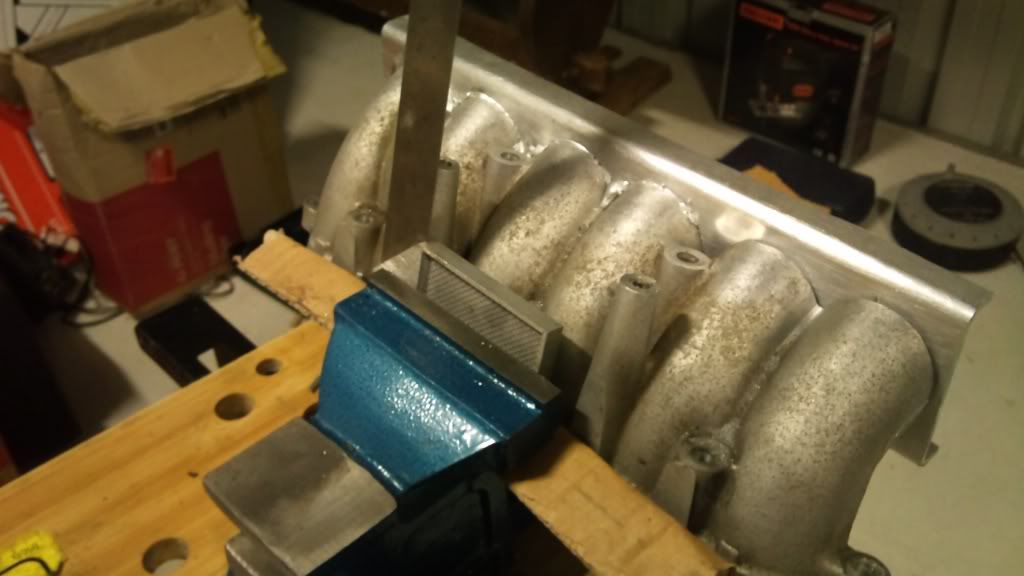
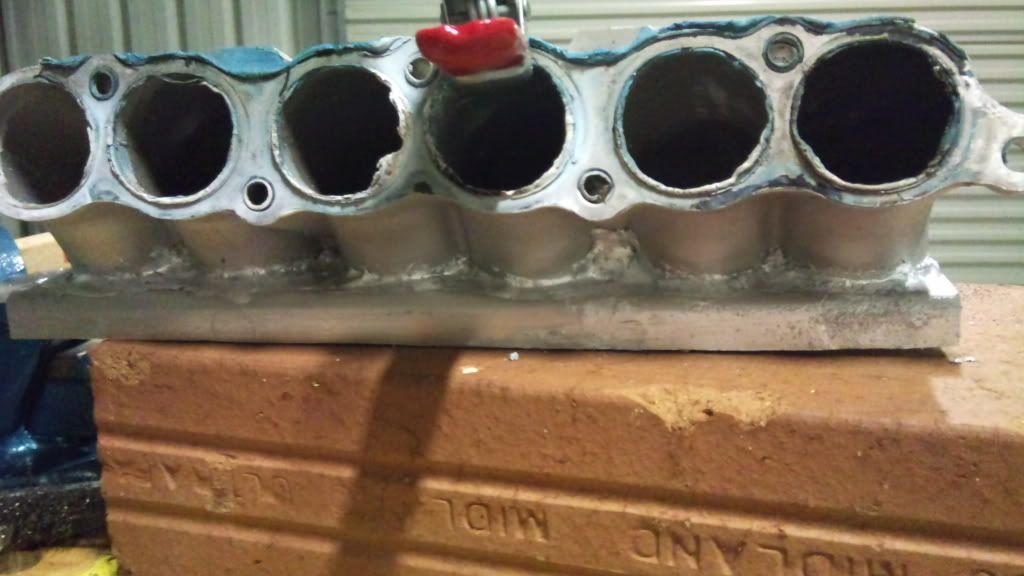
Still not finished
When the liquid/air core arrives that will then be welded to this flange but i've left about a 12mm over hang so that the air has a bit of room (didn't want to weld a flat flange right up to the core as I didn't want to block any passage ways).
I'm going to need more rods as half of them are melted all over the floor!
Re: Robs new project Supercharger
Posted: Fri Jan 27, 2012 1:31 am
by Rob Furniss
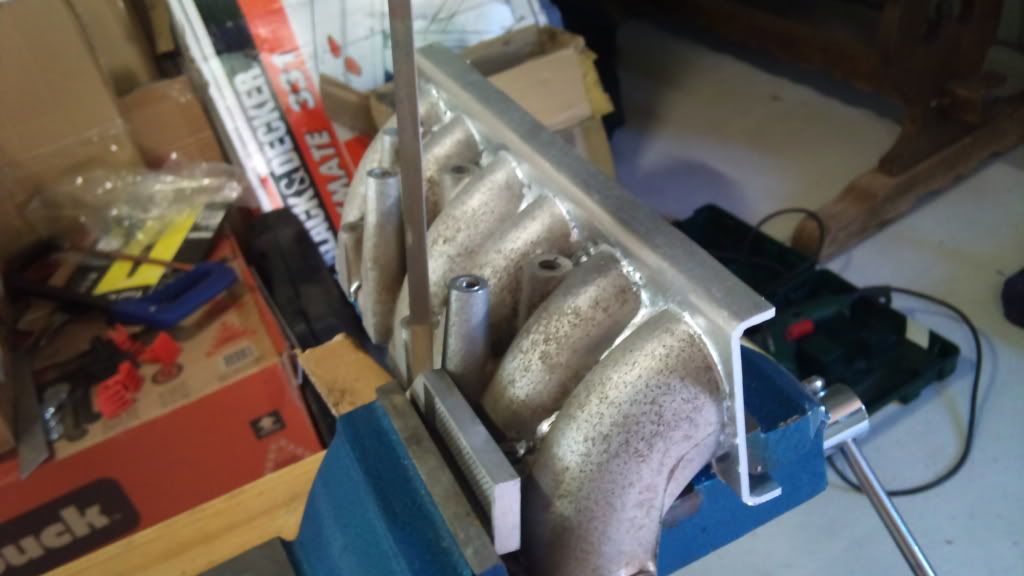
Finished with this part now, cut down plenum is welded to the flange, I am getting the hang of this now although I only have 1 rod left so ordered some more.
Ok so it doesn't look pretty but it's a thicker weld than my first attempt so i'm thinking better.
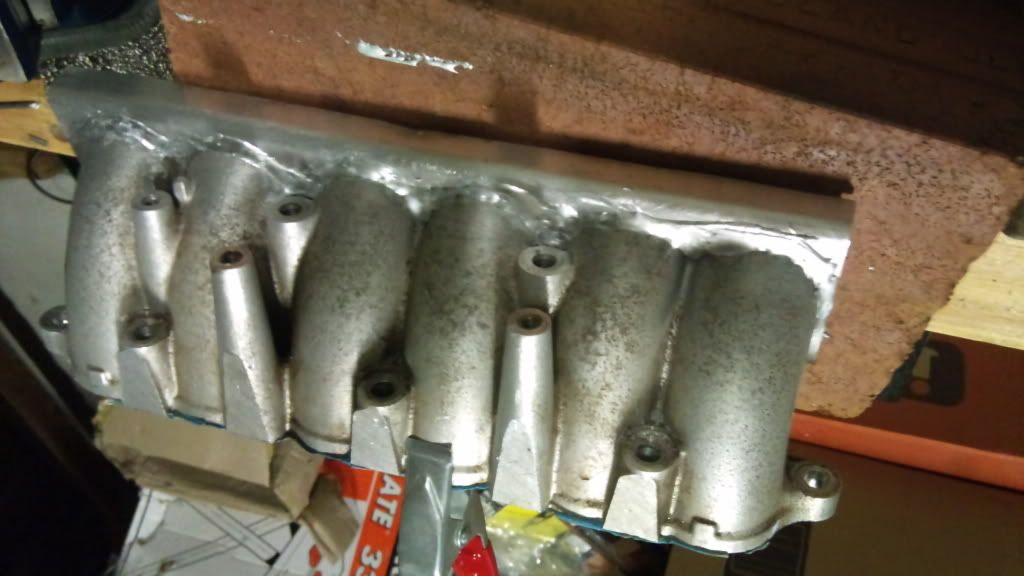
I've never welded anything before guys, this techni 2000 (similar to easyweld, hts 2000 etc) is pretty good and I only used a bernzomatic torch (ts8000) and mapp gas.